
Product Management
Sellers create and look after their products in the Seller Panel. This page covers the products list, creating a product, and each step of the product form.
The products list
Go to Catalog >> Products. The list shows every product you sell: the ones you created and the catalog products you sell as your own.
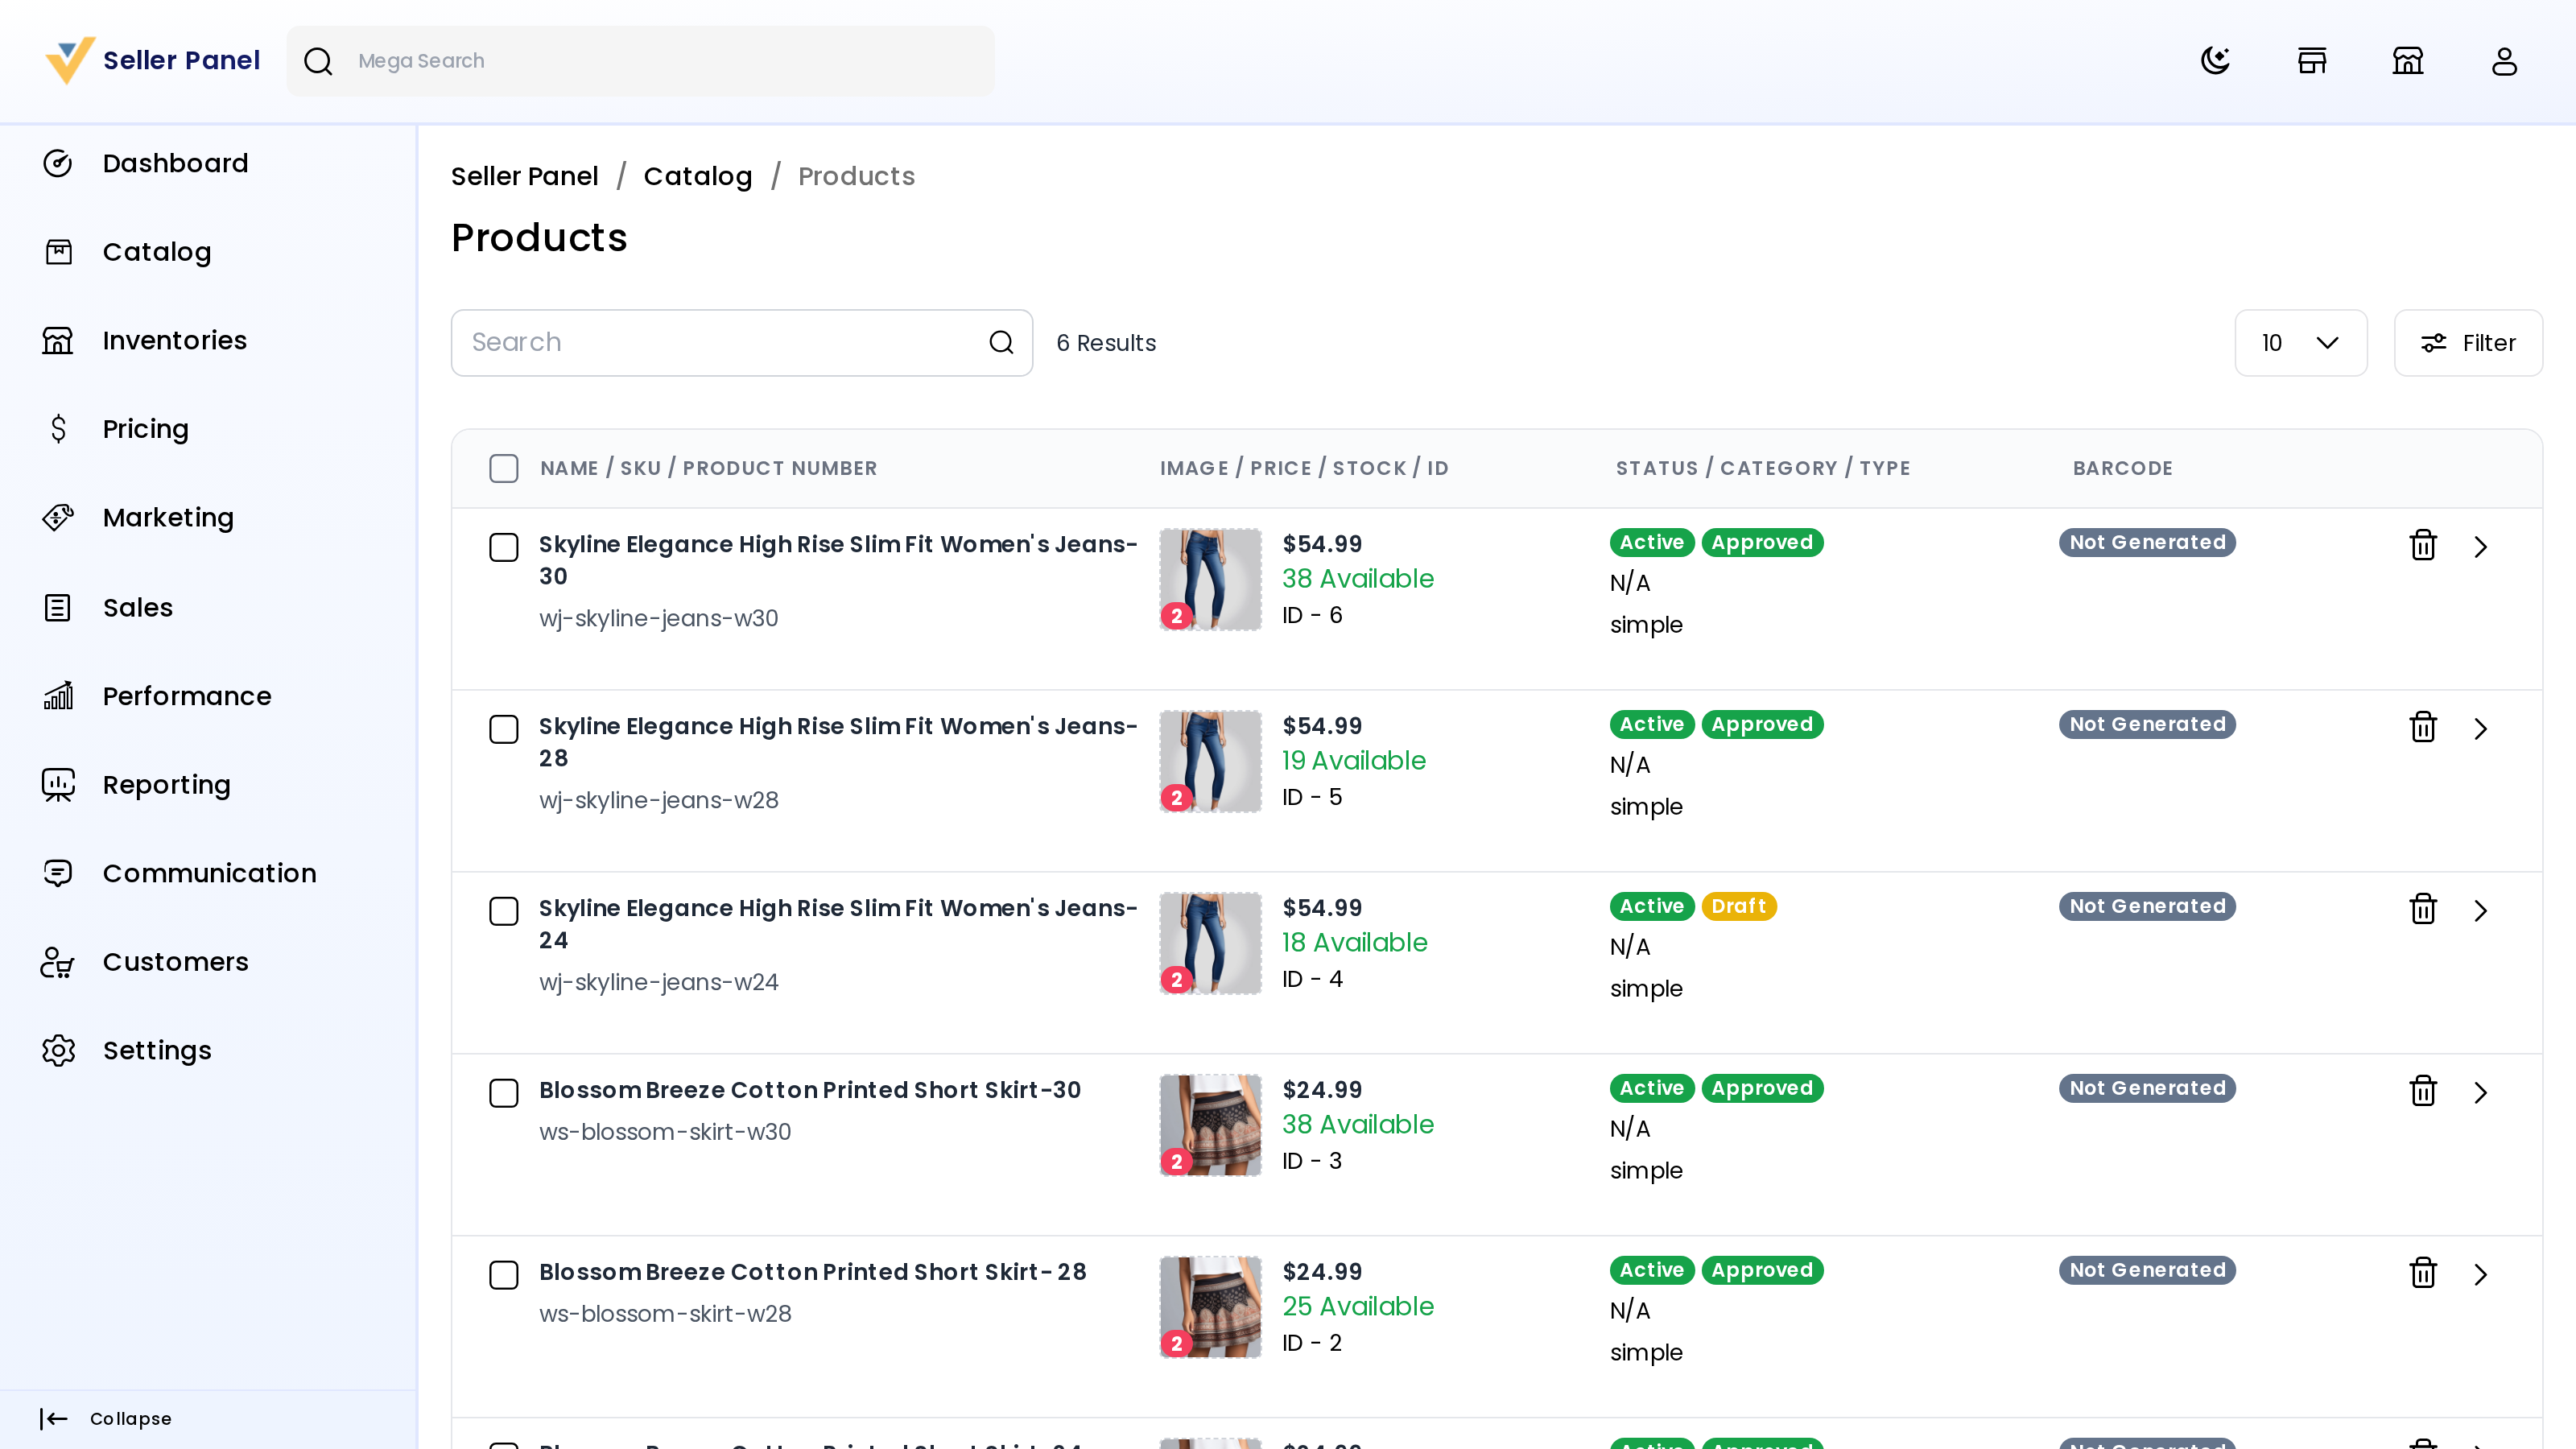
Each row shows:
- the name, SKU and product number;
- the image, price, stock and listing ID;
- the status (Active or Disable), the approval badge, the category and the product type;
- the barcode, or Not Generated.
The approval badge is Draft, Waiting For Approval, Approved or Rejected. See Product Approval.
- Use Search or Filter to find products by name, SKU, status, approval, draft status, type, category, price, product number, ID or barcode value.
- Click the edit arrow to open a product, or the delete icon to remove it.
- Tick products to use Select Action: Delete, Generate Barcode or Print Barcodes. See Product Barcode.
Add a product
- Go to Catalog >> List Your Product.
- Choose how to add the product:
- Create New Products — create a product that isn't in the store yet.
- Search Products — sell a product that is already in the store's catalog. See Selling Existing Products.
- Bulk Upload — add many products from a spreadsheet. See Bulk Upload.
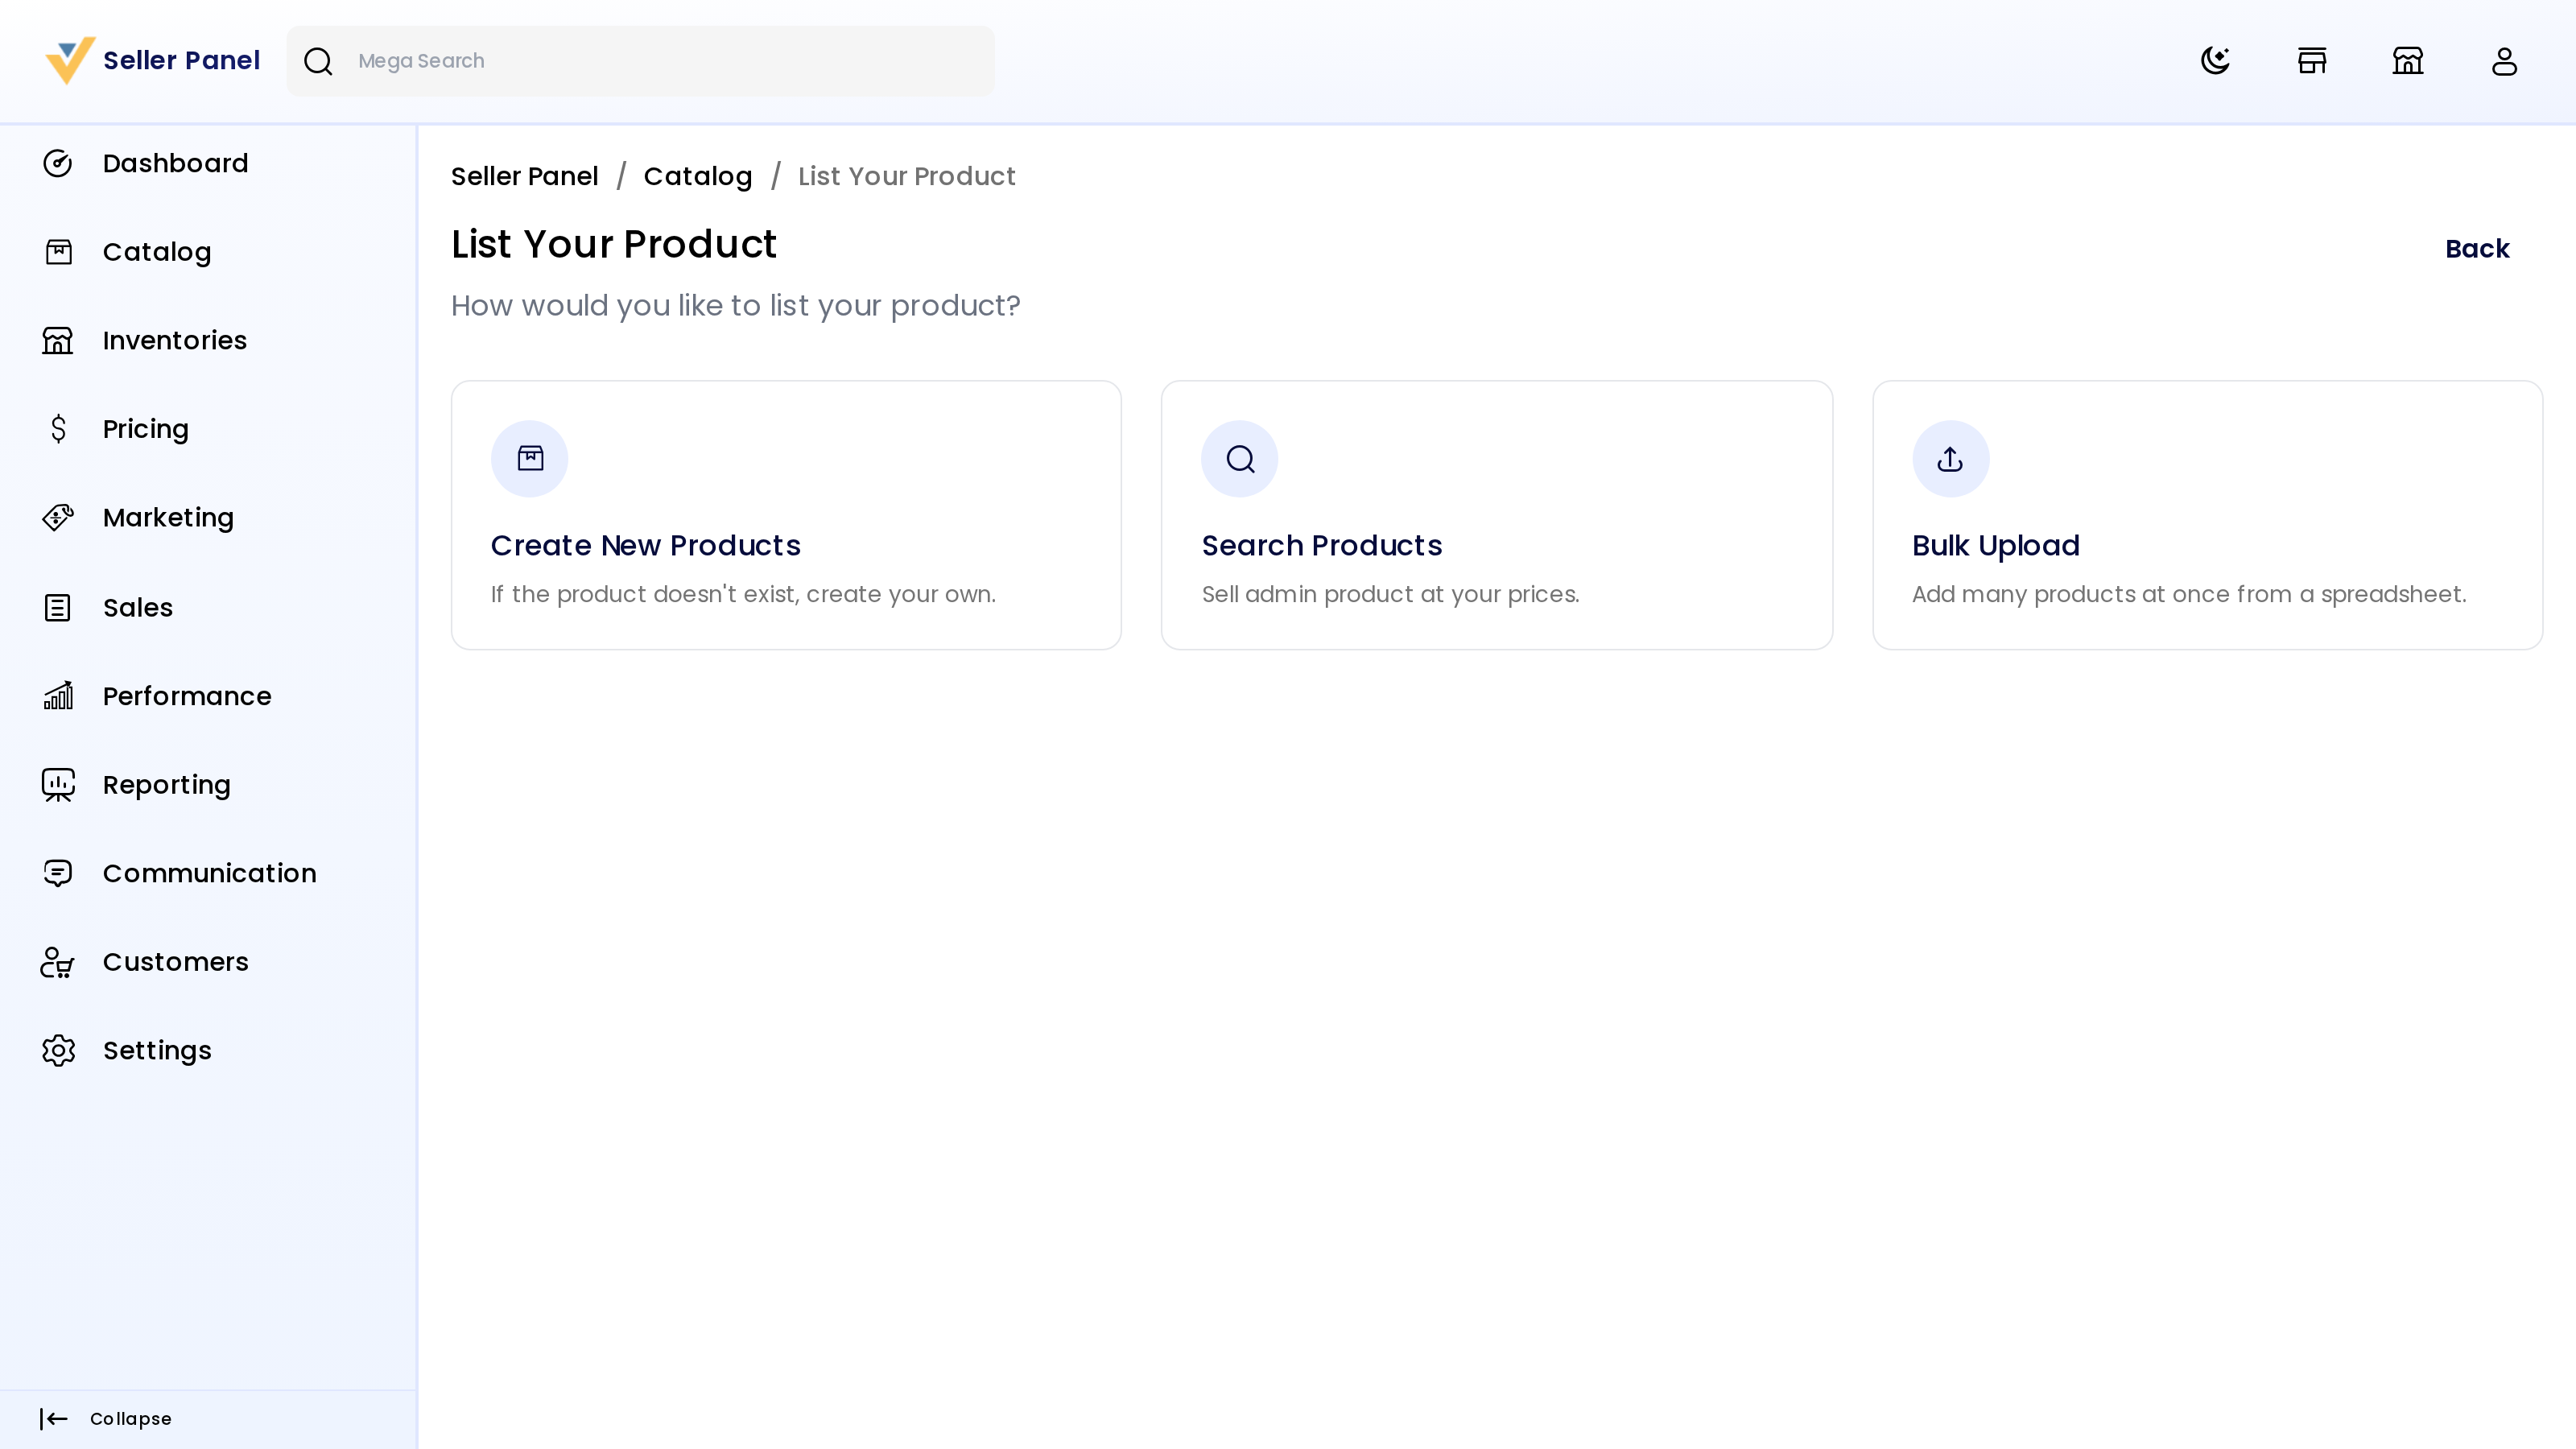
The store's settings and your role decide which options you see. You also need a complete profile. If it isn't, you are sent back with Please update your profile details. See Manage Profile.
If the store has turned off the stepped product form, List Your Product is one page instead. Search for a catalog product under Search Products, or choose the Product Type, Attribute Family and SKU under Create New Products and click Continue.
Create a new product
- Click Create New Products.
- Under What kind of product are you selling?, choose one:
- Physical Product — something you ship.
- Digital Download — a file such as an e-book or software.
- Service or Membership — something with no shipping, such as a membership.
- Bookable — something customers reserve for a date or time.
- Bundle — several products sold together.
- Grouped Products — a set of related products shown together.
- For a physical product, answer Does this product have variations?. Choose Yes for a product that comes in sizes or colours.
- Choose the attribute family under Which attribute family does your product belong to?.
- For a product with variations, tick the attributes that vary under Which attributes will vary?.
- Under What SKU would you like to use?, enter a unique SKU made of letters and numbers joined by hyphens, for example
ut-organic-crew-tee. - Click Continue. The product is created as a draft and its edit page opens.
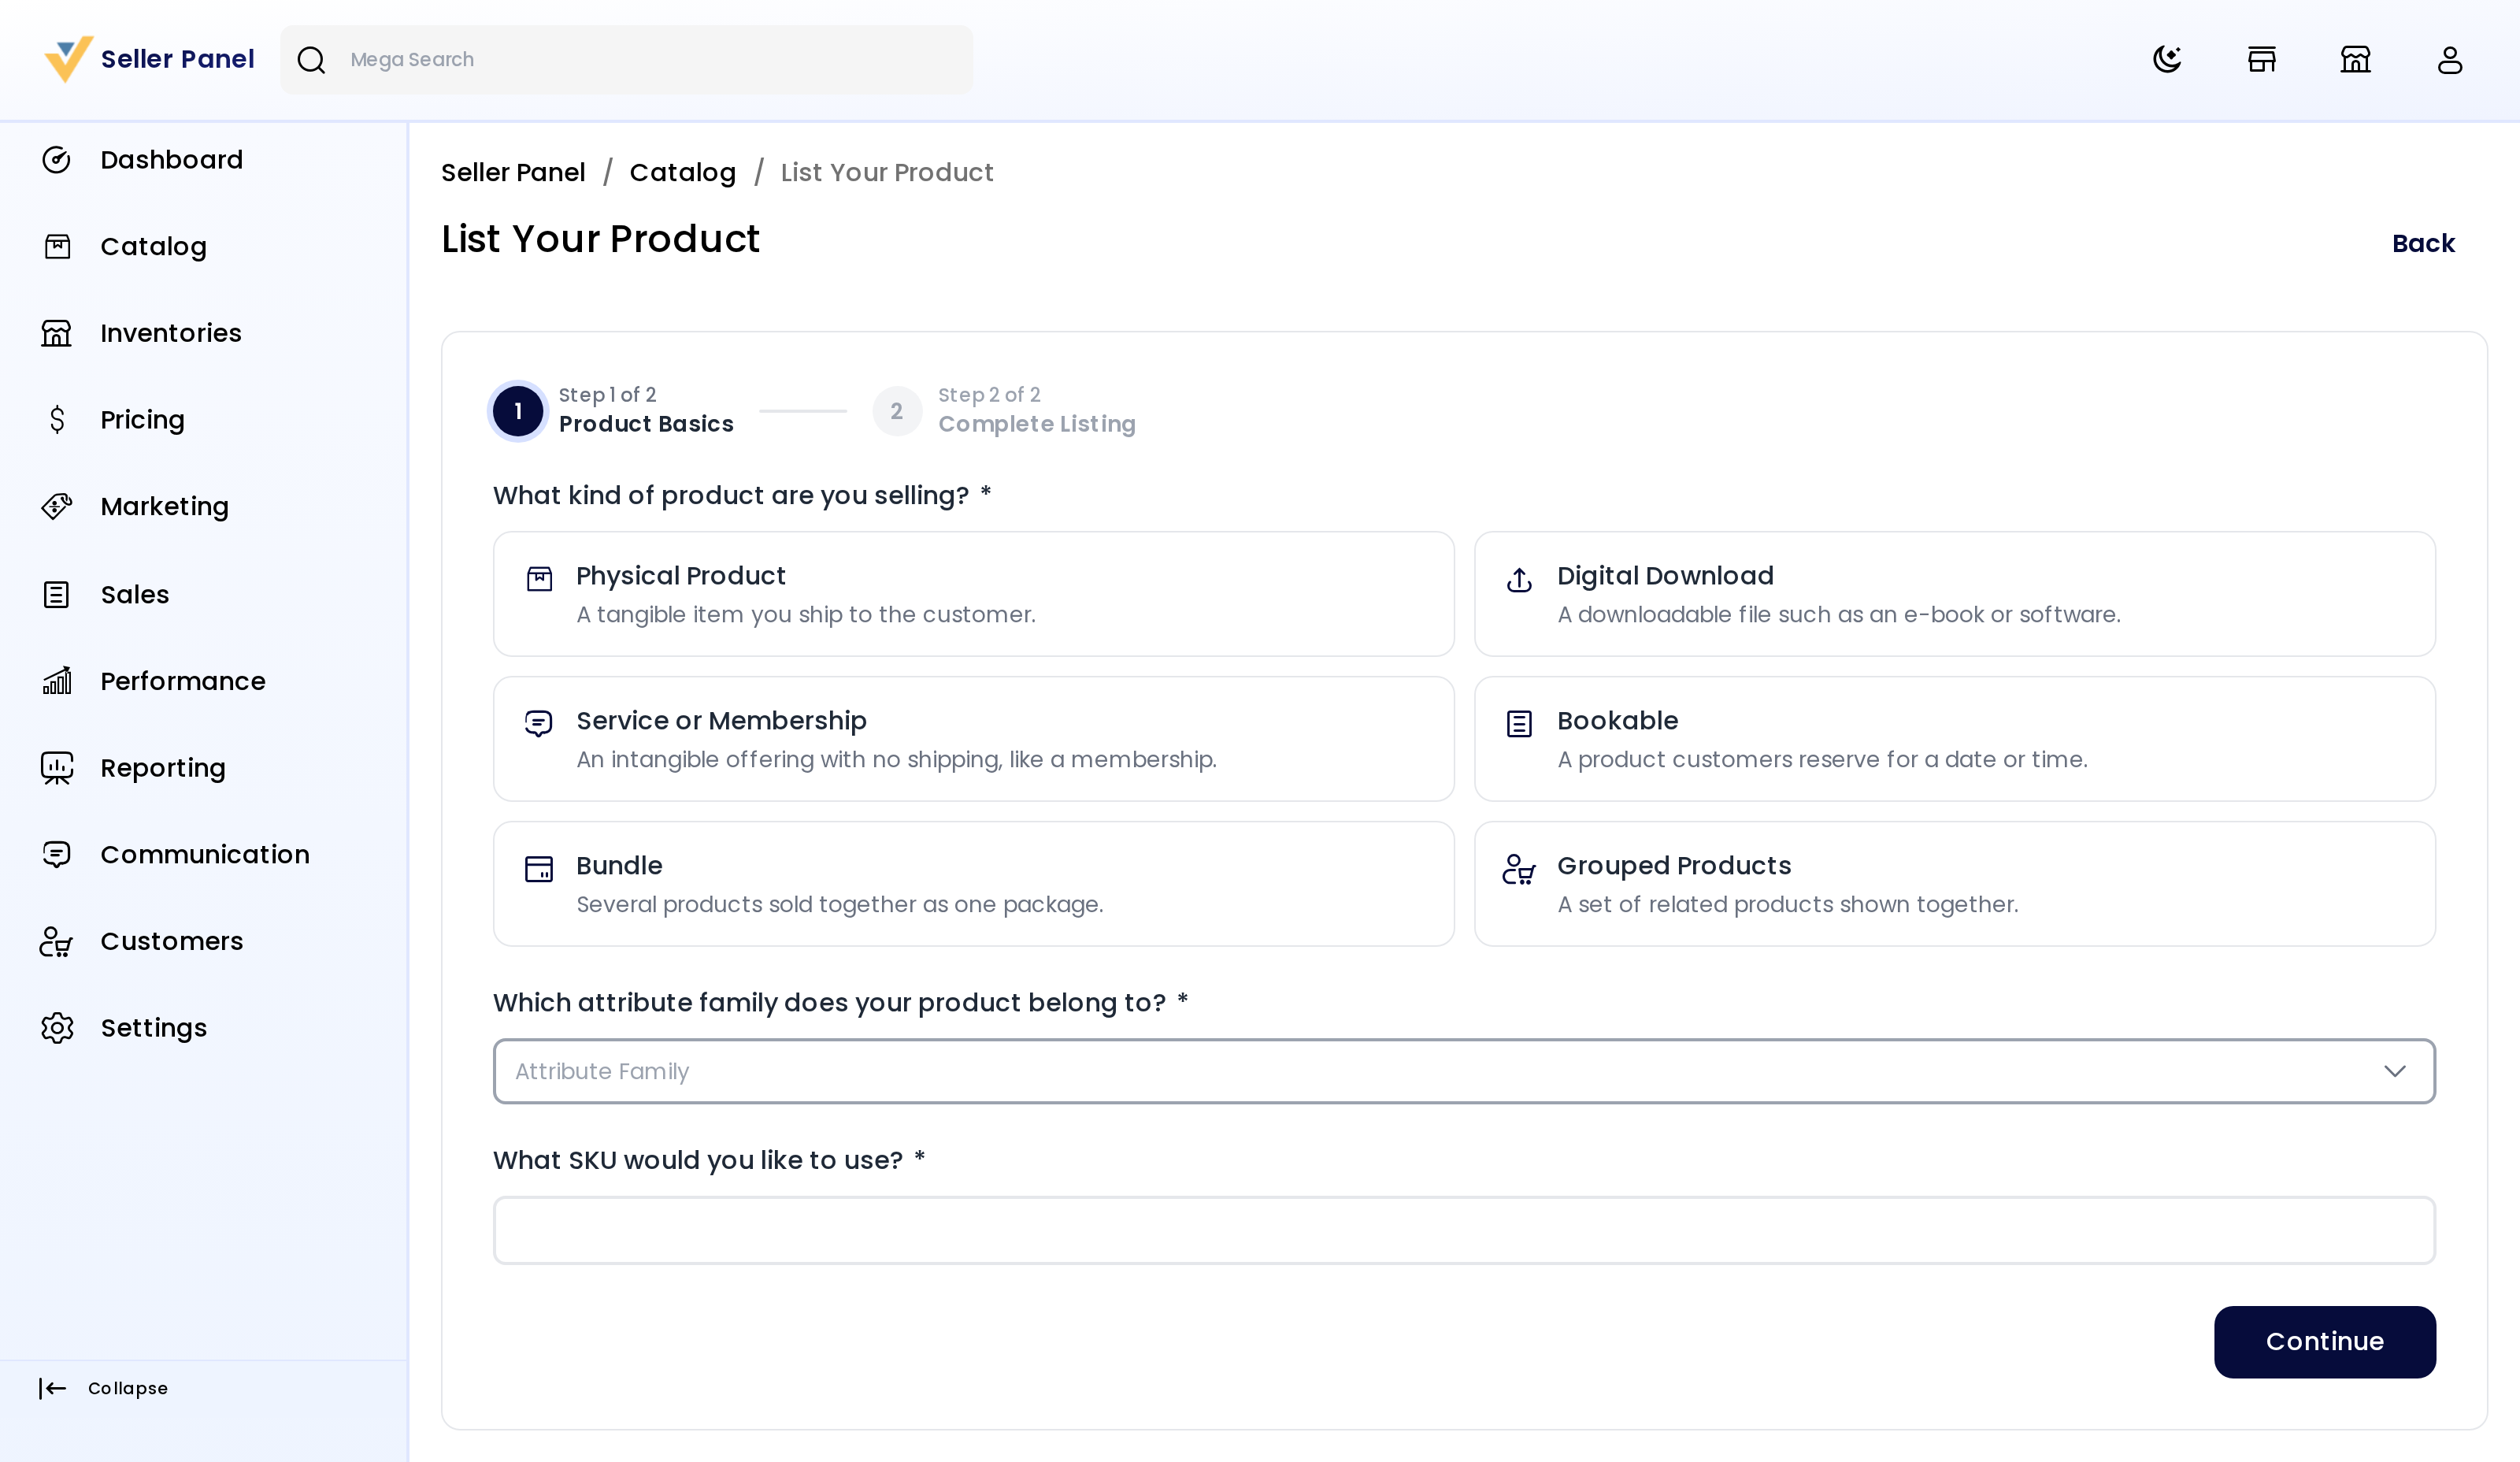
You only see the kinds of product the store allows you to sell.
Fill in the product form
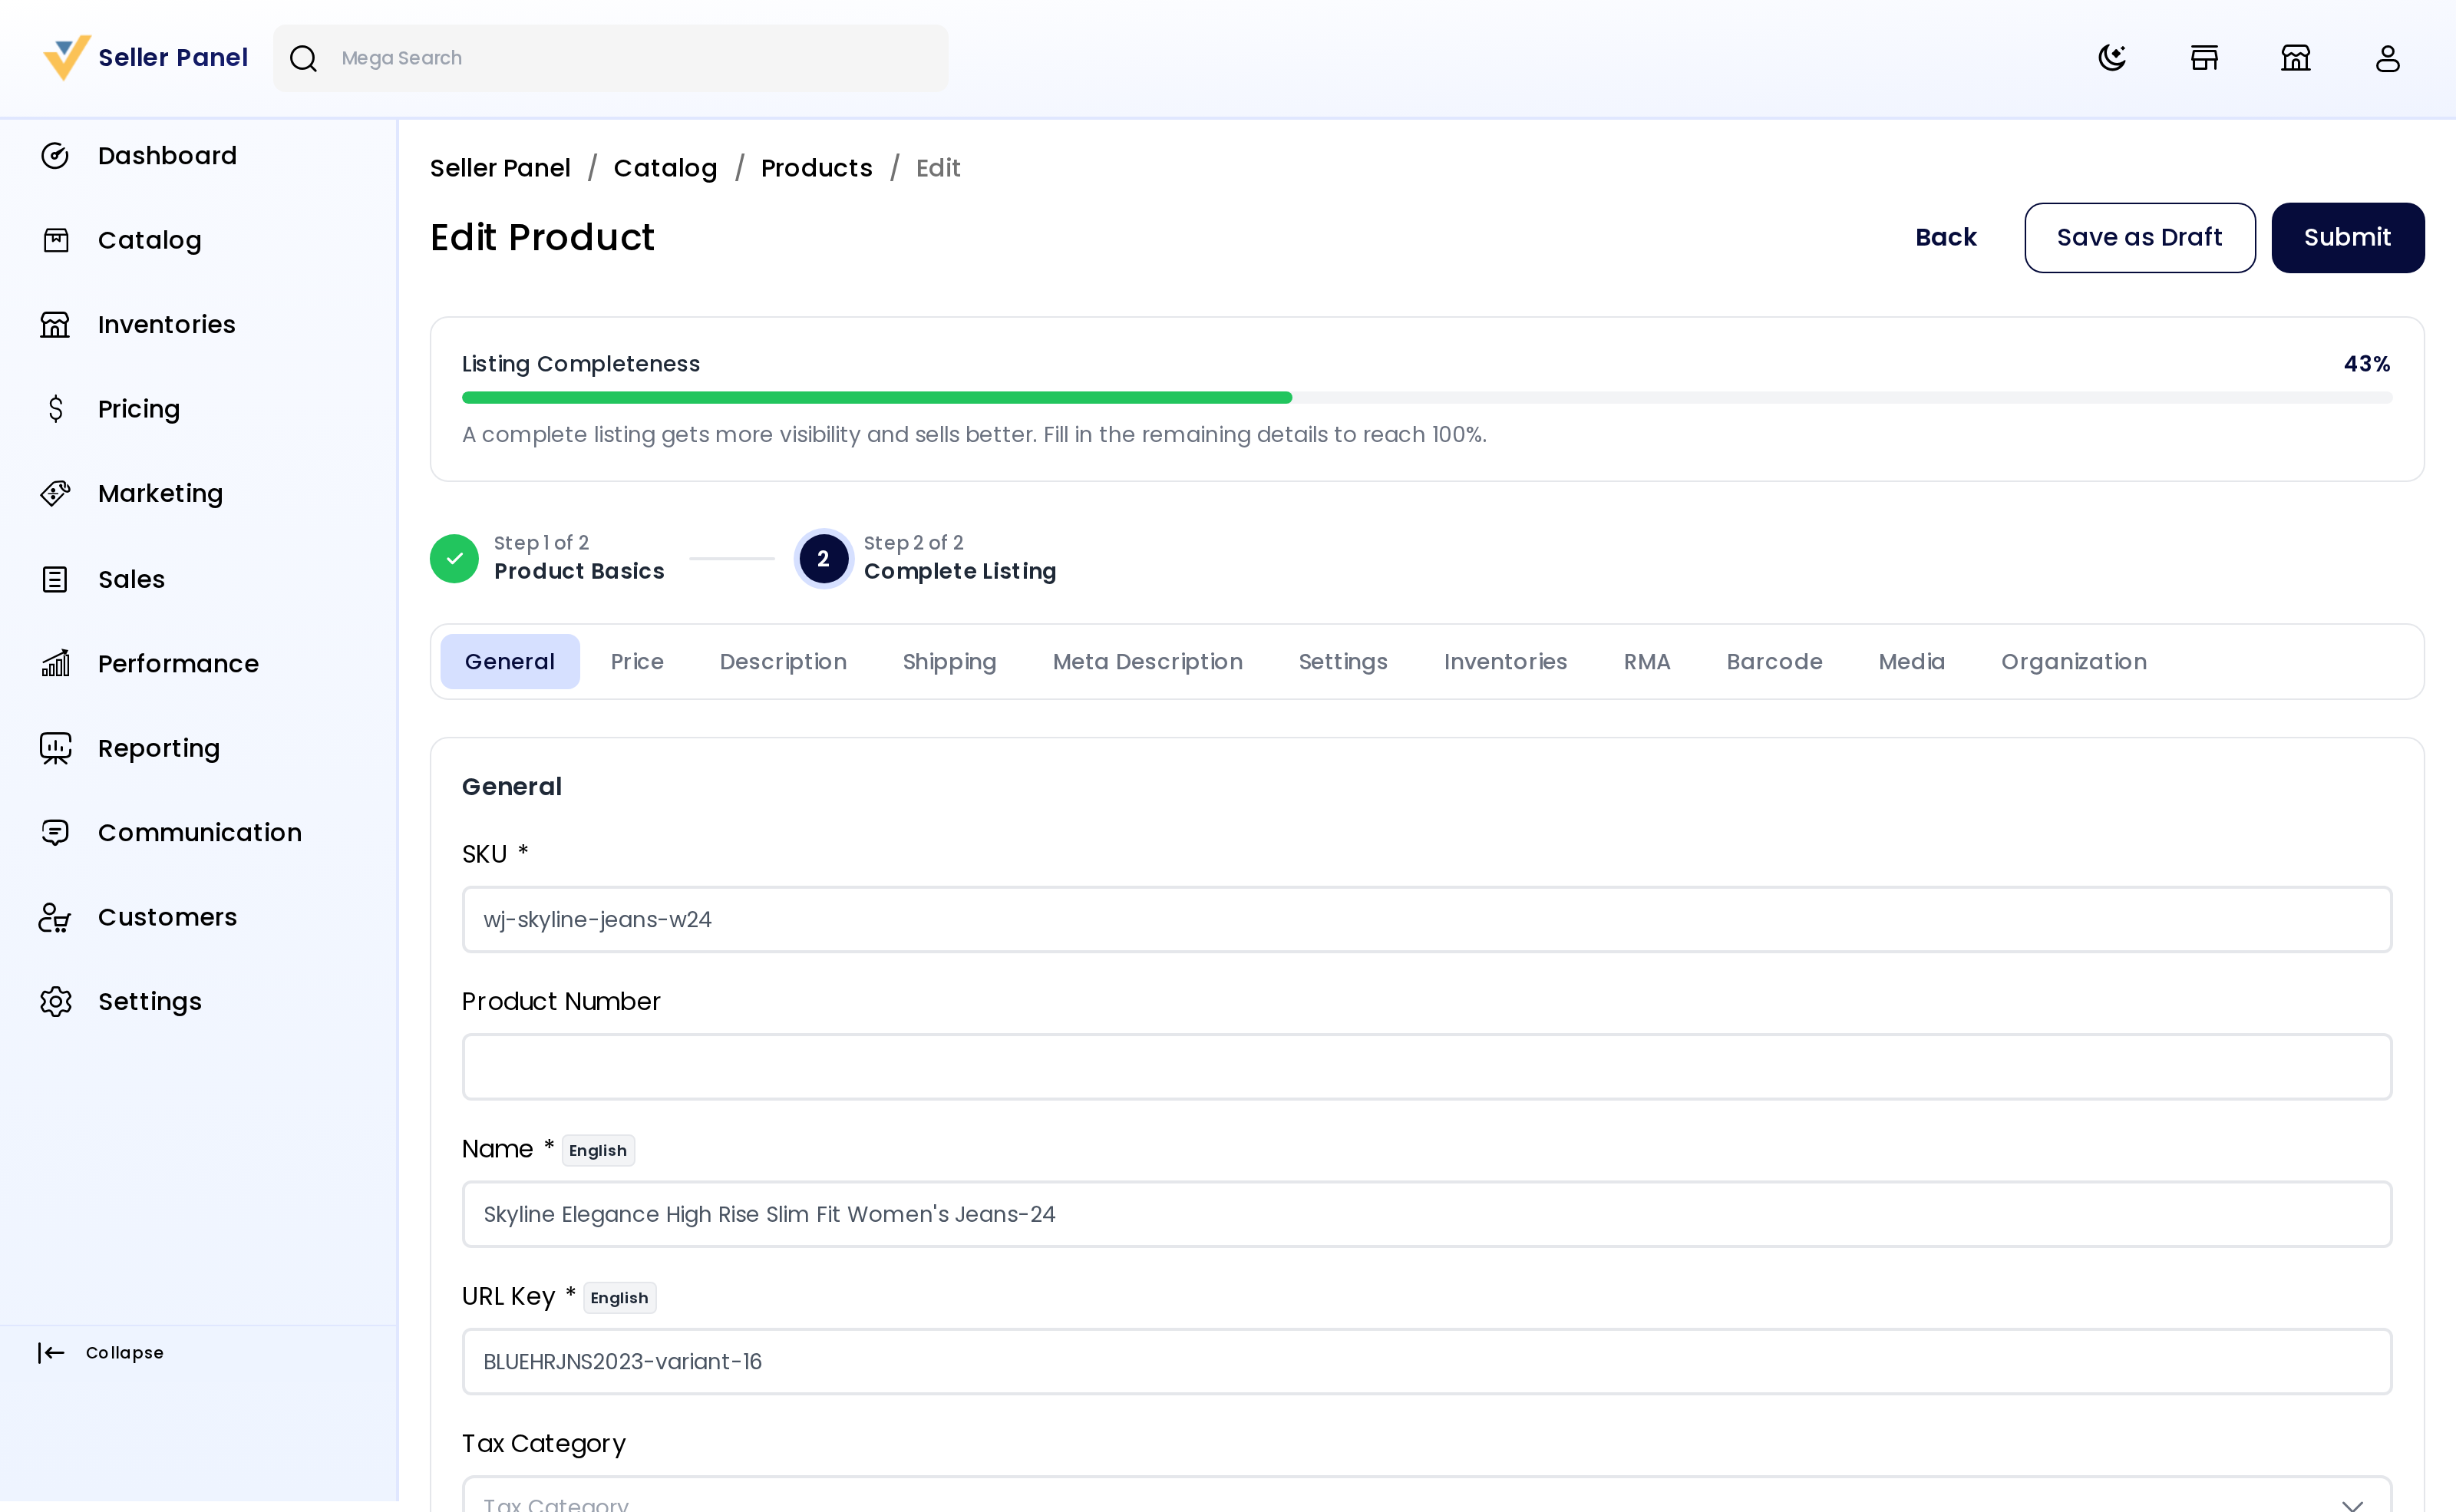
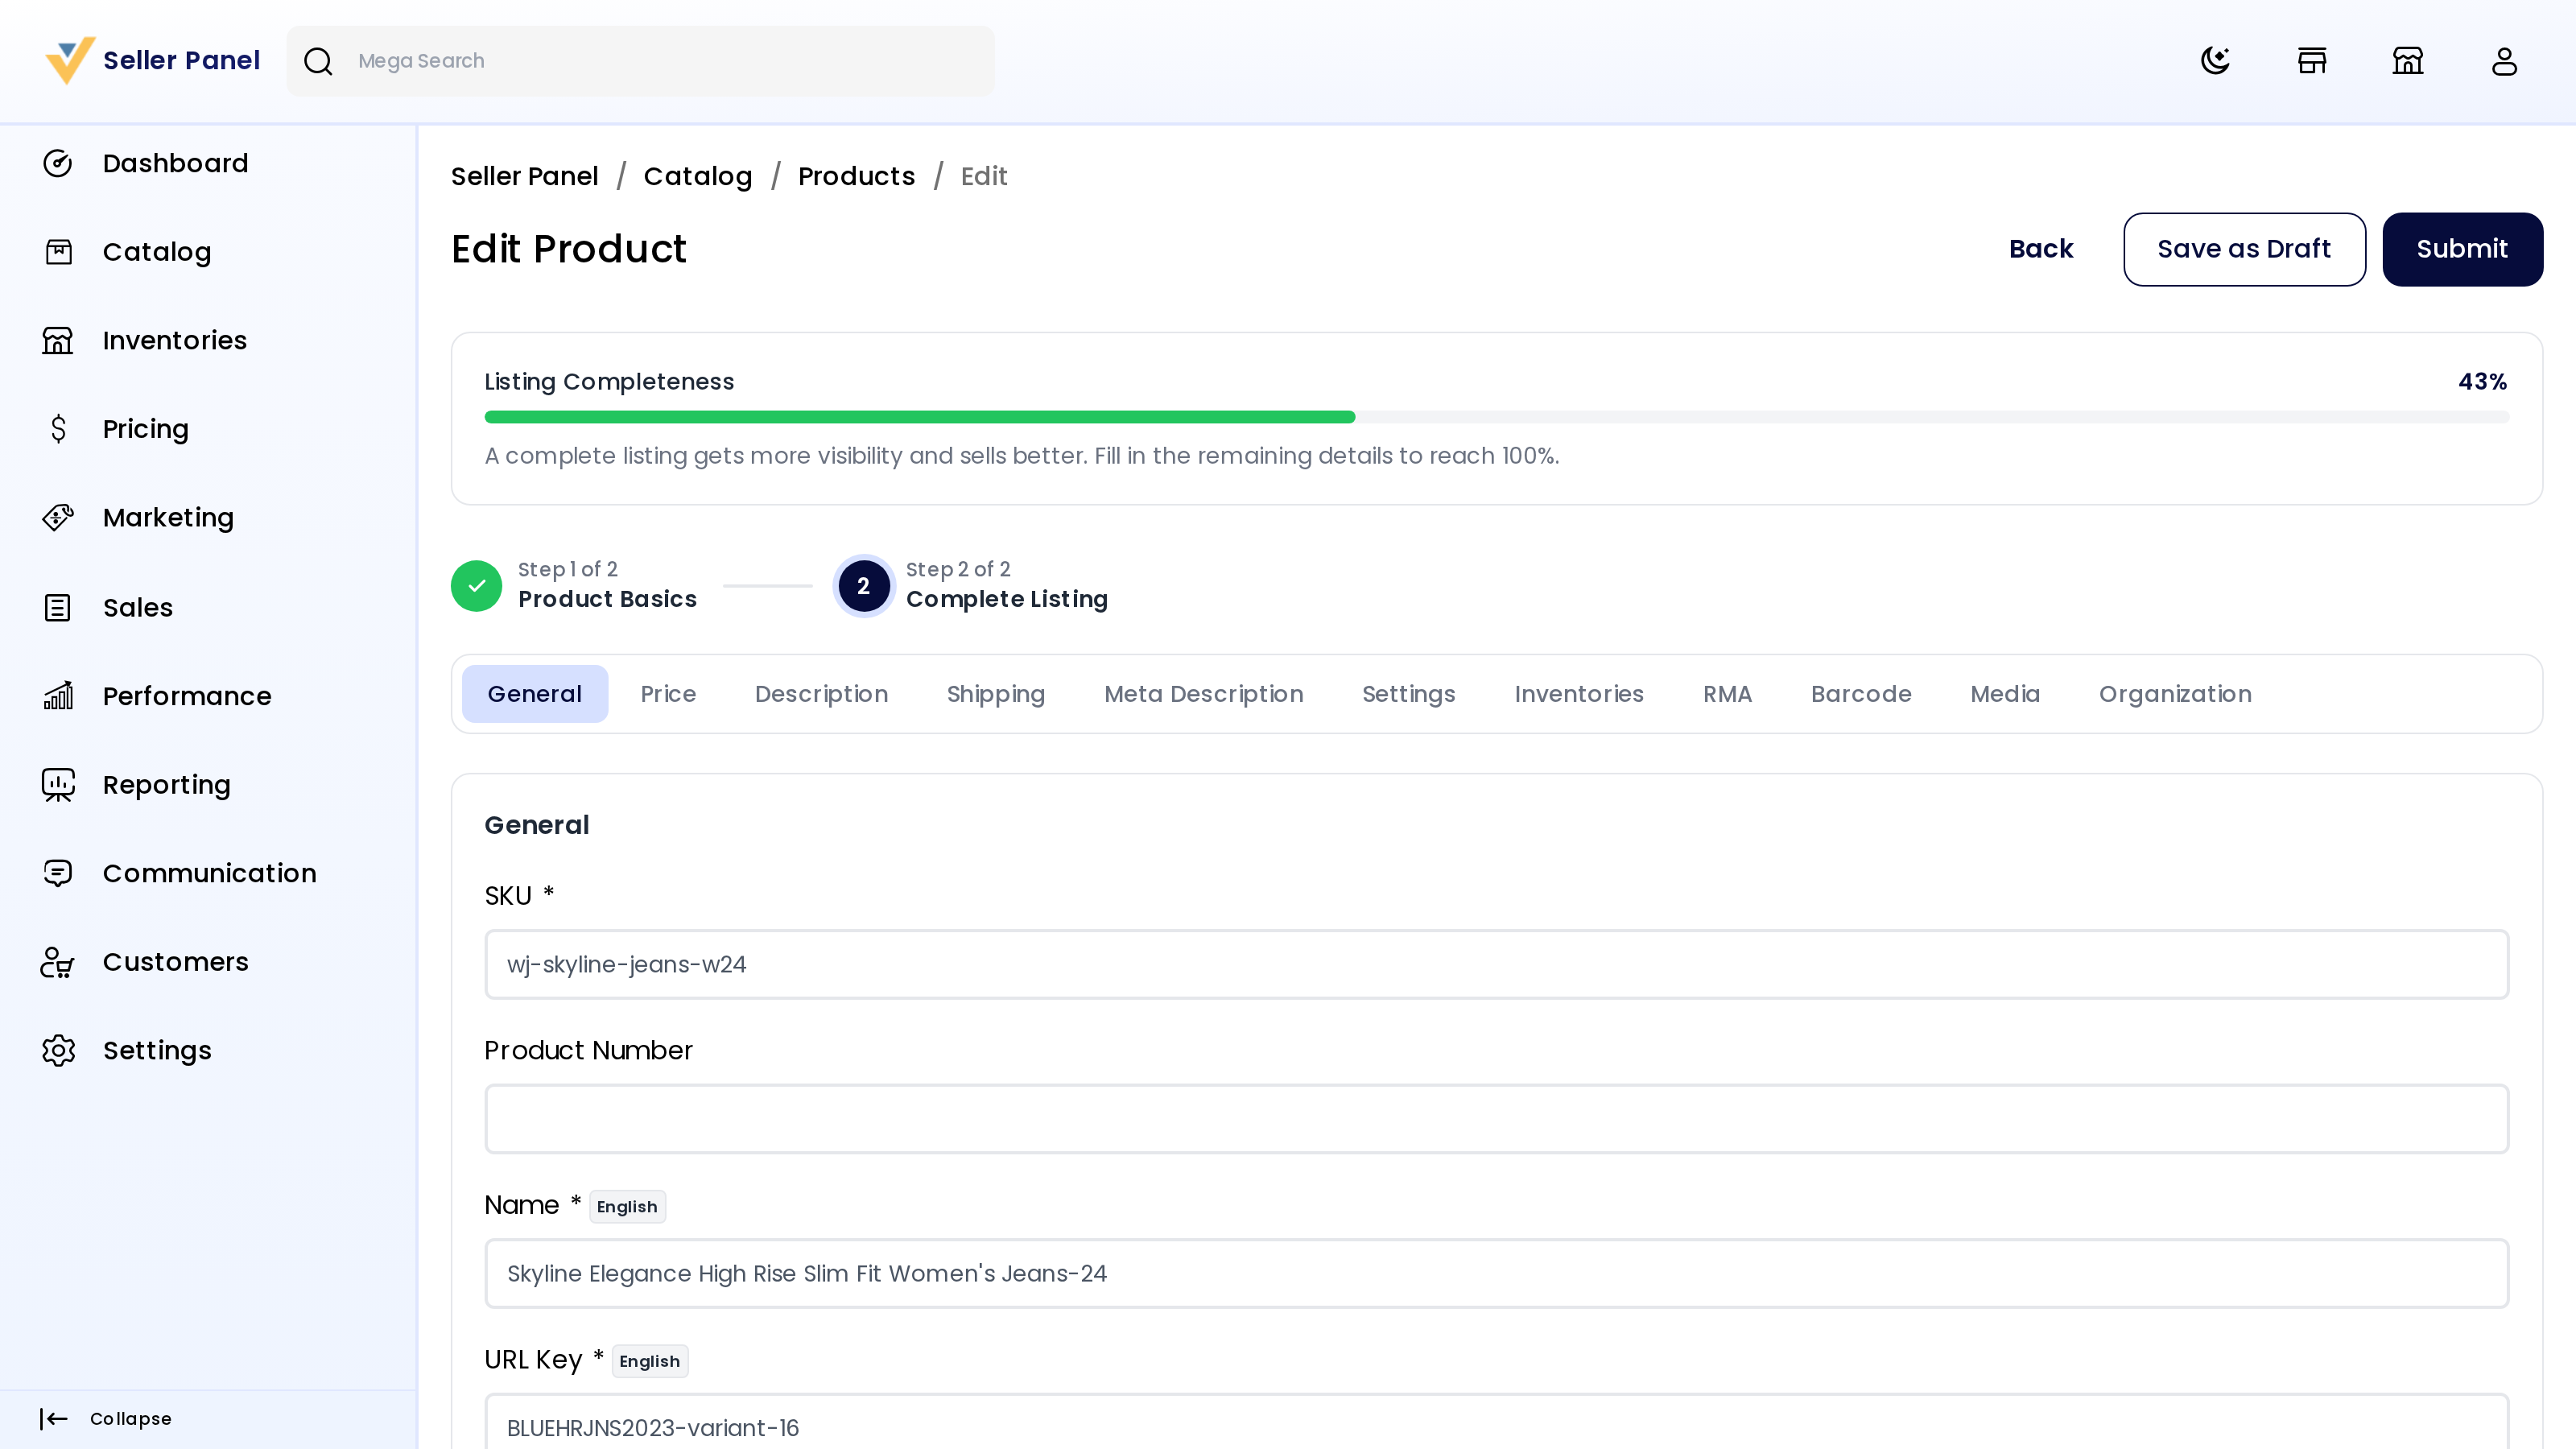
At the top of the page you'll find:
- Back, to return to your products.
- Generate content, to have Generative AI (Magic AI) write the listing. It appears when the store has switched it on for you and, if you are a team member, your role includes Generate Content With Magic AI. See Generate Product Content.
- Preview, to open the product on the storefront once it is enabled and visible.
- Save as Draft and Submit for a draft, or Save Product once it is submitted.
- Listing Completeness, a bar showing how much of the form is filled in, when the store has Show Progress Bar on.
If your store has more than one channel or language, choose it at the top before you edit the fields marked with a channel or language name.
The steps
Usually the form is split into steps. Move between them with the tabs, or with Previous and Next. A step with a mistake is marked so you can find it. If the store uses the two-column layout for the product's attribute family, the whole form is on one page instead. The steps come from the product's attribute family, so yours may differ. With the default family they are:
| Step | What you fill in |
|---|---|
| General | SKU, product number, name, URL key, tax category, and options such as colour, size and brand |
| Price | Price, cost, and a special price with its start and end dates |
| Description | Short description and description |
| Shipping | Length, width, height and weight |
| Meta Description | Meta title, keywords and description for search engines |
| Settings | New, Featured, Visible Individually, Status and Guest Checkout |
| Inventories | Manage Stock, and the quantity in each of your inventory sources |
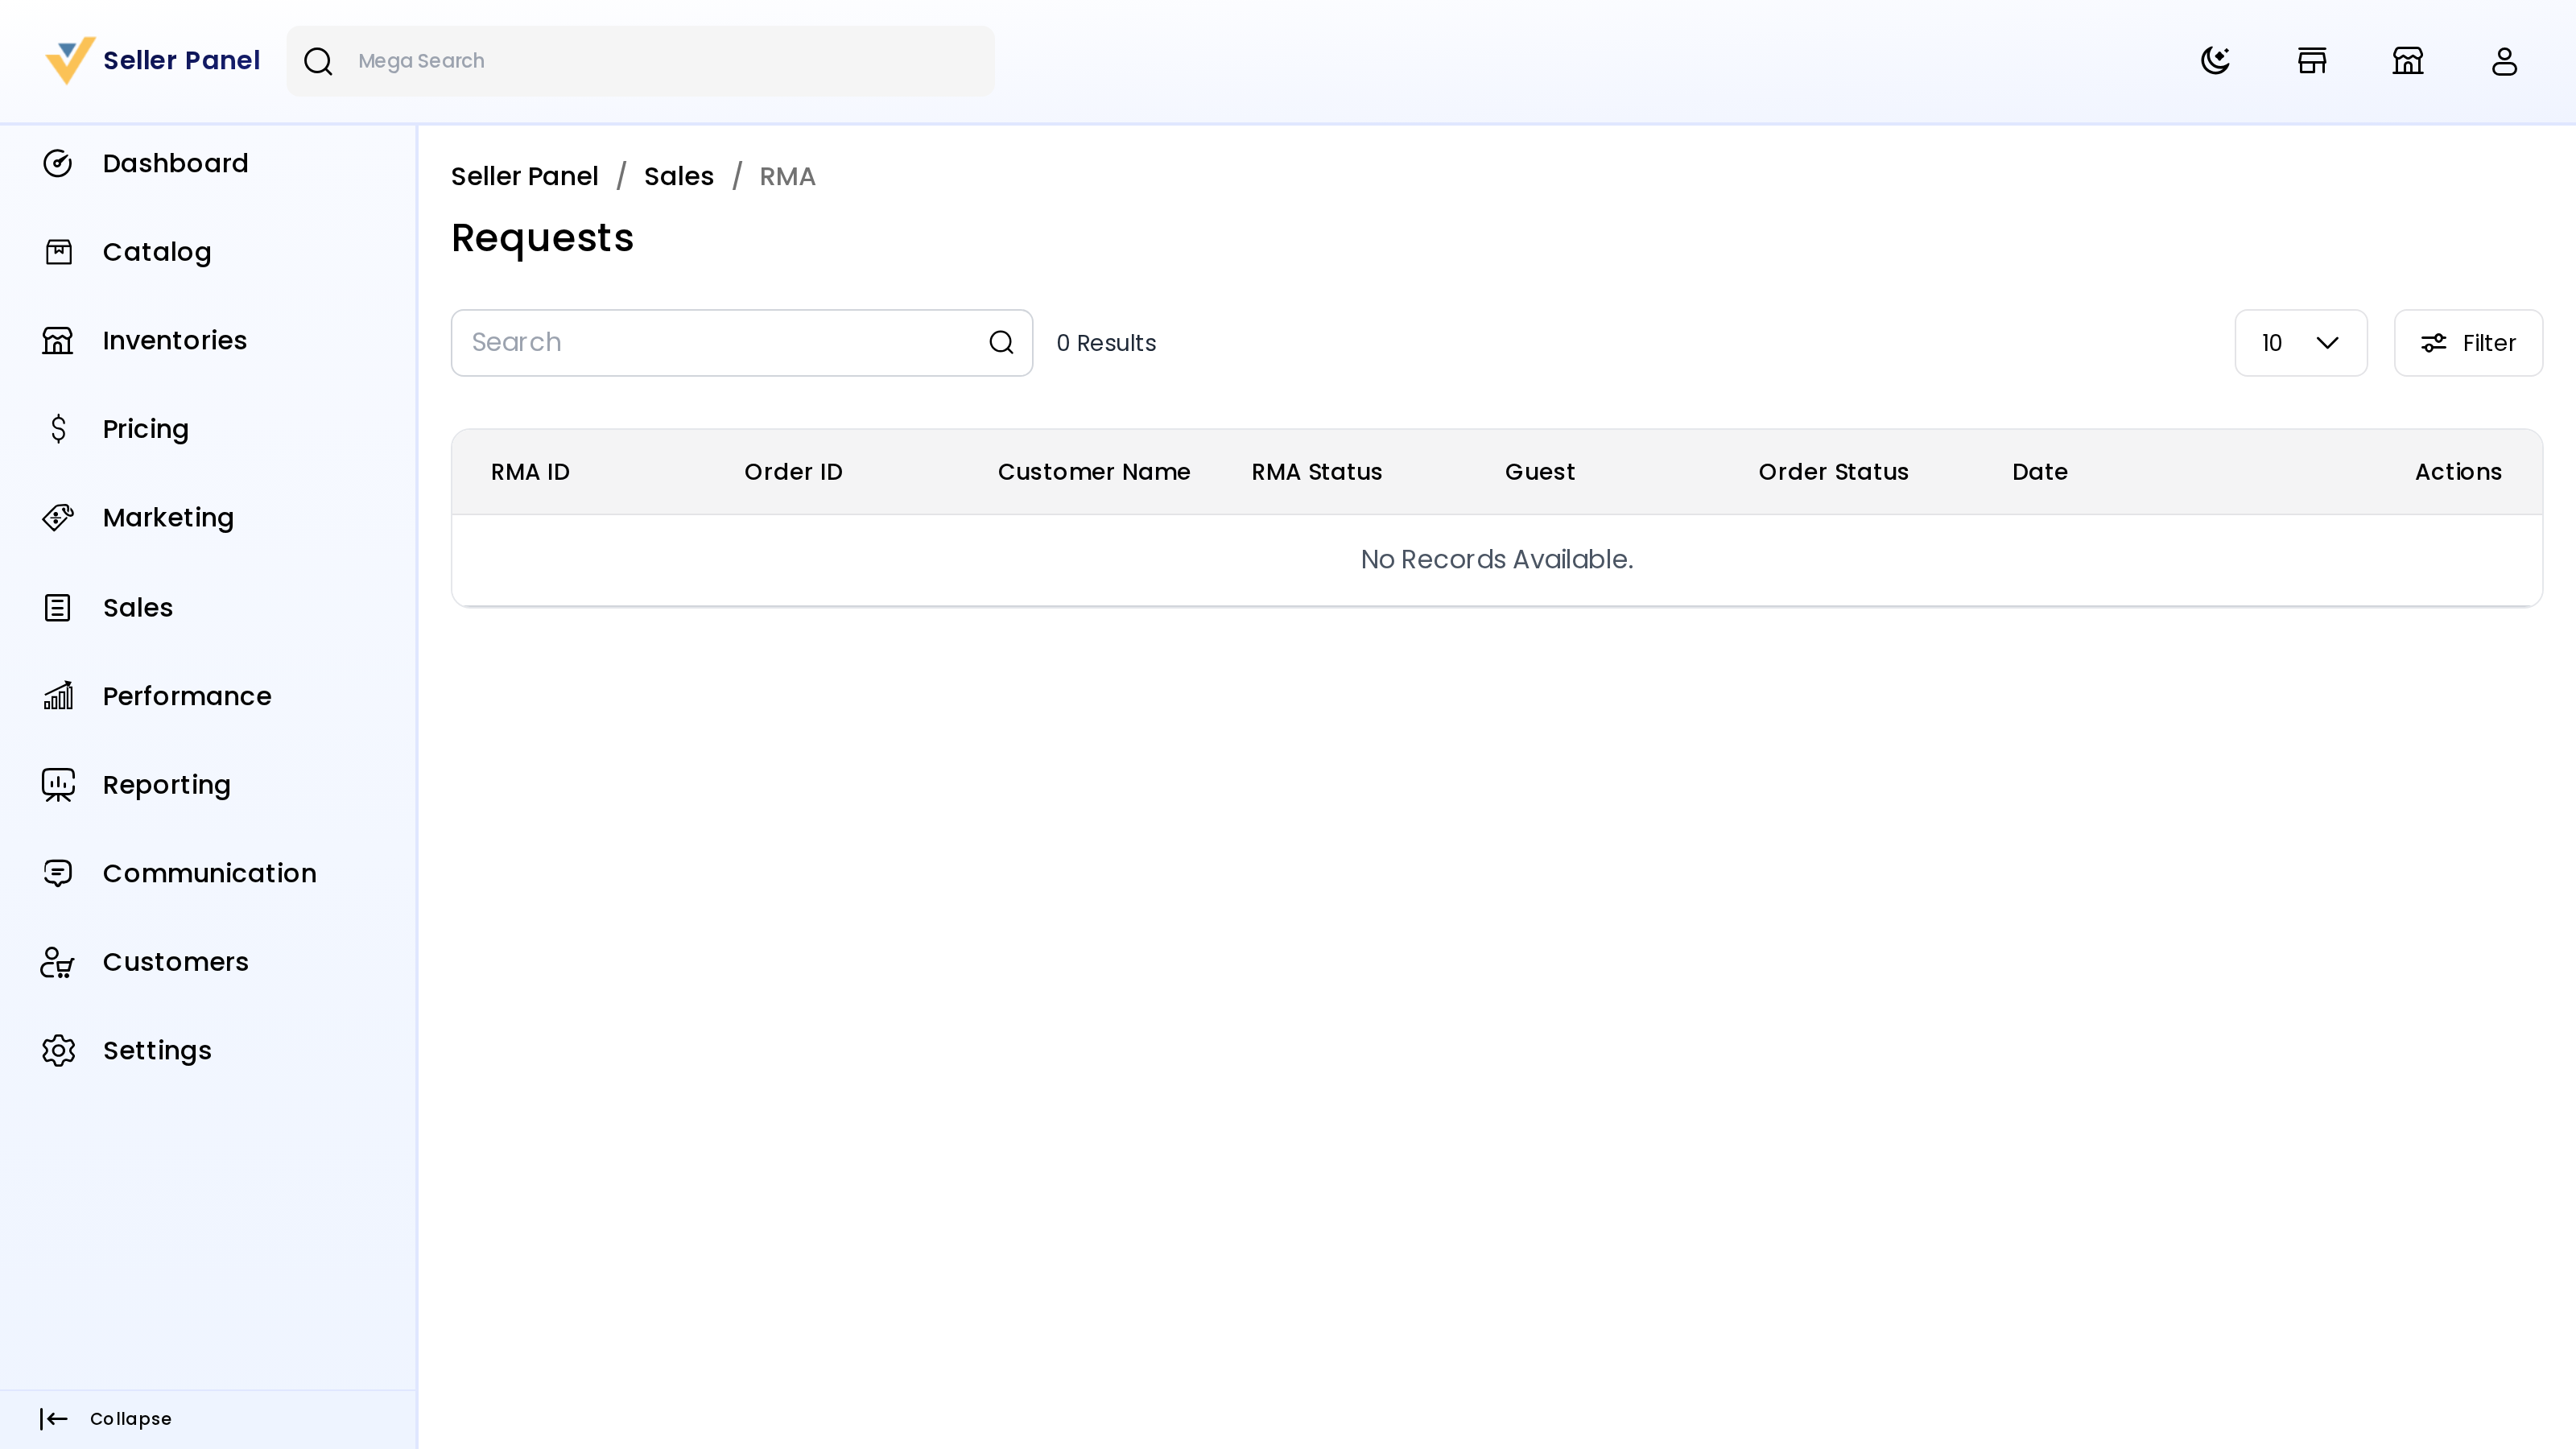
| RMA | Allow RMA and the return rule for the product |
| Barcode | Barcode Value. See Product Barcode. |
| Media | Images (PNG or JPEG) and videos (MP4, WebM or MKV) |
| The product type | The details for the kind of product, such as variations or bundle items |
| Organization | Channels, categories, and related, up-sell and cross-sell products |
The store can change how the form looks for each attribute family. See Product Form Layout.
Customer group prices
In the Price step, click Add New under Customer Group Price to offer a different price for a customer group or for larger quantities. Choose the Customer Group, enter the Qty, choose the Price Type (Fixed or Discount), enter the Price and click Save.
The product type step
| Kind of product | Step | What you add |
|---|---|---|
| Physical Product with variations | Variations | Variants, each with its own name, SKU, price, weight, status, stock and images. Pick the options for each attribute that varies, such as sizes and colours, and a variant is added for every combination. |
| Digital Download | Downloadable Links | Links with a title, price, download limit and file or URL, and optional samples |
| Bundle | Bundle Items | Options with their products and default quantities |
| Grouped Products | Group Products | The products in the group and their default quantities |
| Bookable | Booking Type | The booking type and its availability |
| Physical Product without variations | Customizable Item | Options customers can choose or fill in, such as engraving text |
Save the product
- Click Save as Draft to finish later, or Submit when the product is ready.
- For a product you have already submitted, click Save Product.
You'll see Product updated successfully. See Product Approval for what happens after you submit.
Delete a product
Click the delete icon on the product's row, or tick several products and use Select Action >> Delete. Deleting a product you created removes it from the store. Deleting a catalog product you sell removes only your offer.
Limits from your plan
If the store uses subscription plans, your plan can limit how many products you list and which kinds you can create. Once you reach the limit, you'll see You have reached max limit of … products. See Choosing a Plan.