
Seller Attributes
Seller attributes are the fields that make up a seller's details: what they fill in when they sign up, what they see on their profile, and what customers see on their shop page. The marketplace comes with the fields most stores need, and you can add your own, such as a tax number.
The attributes list
Go to Marketplace >> Sellers >> Seller Attributes.
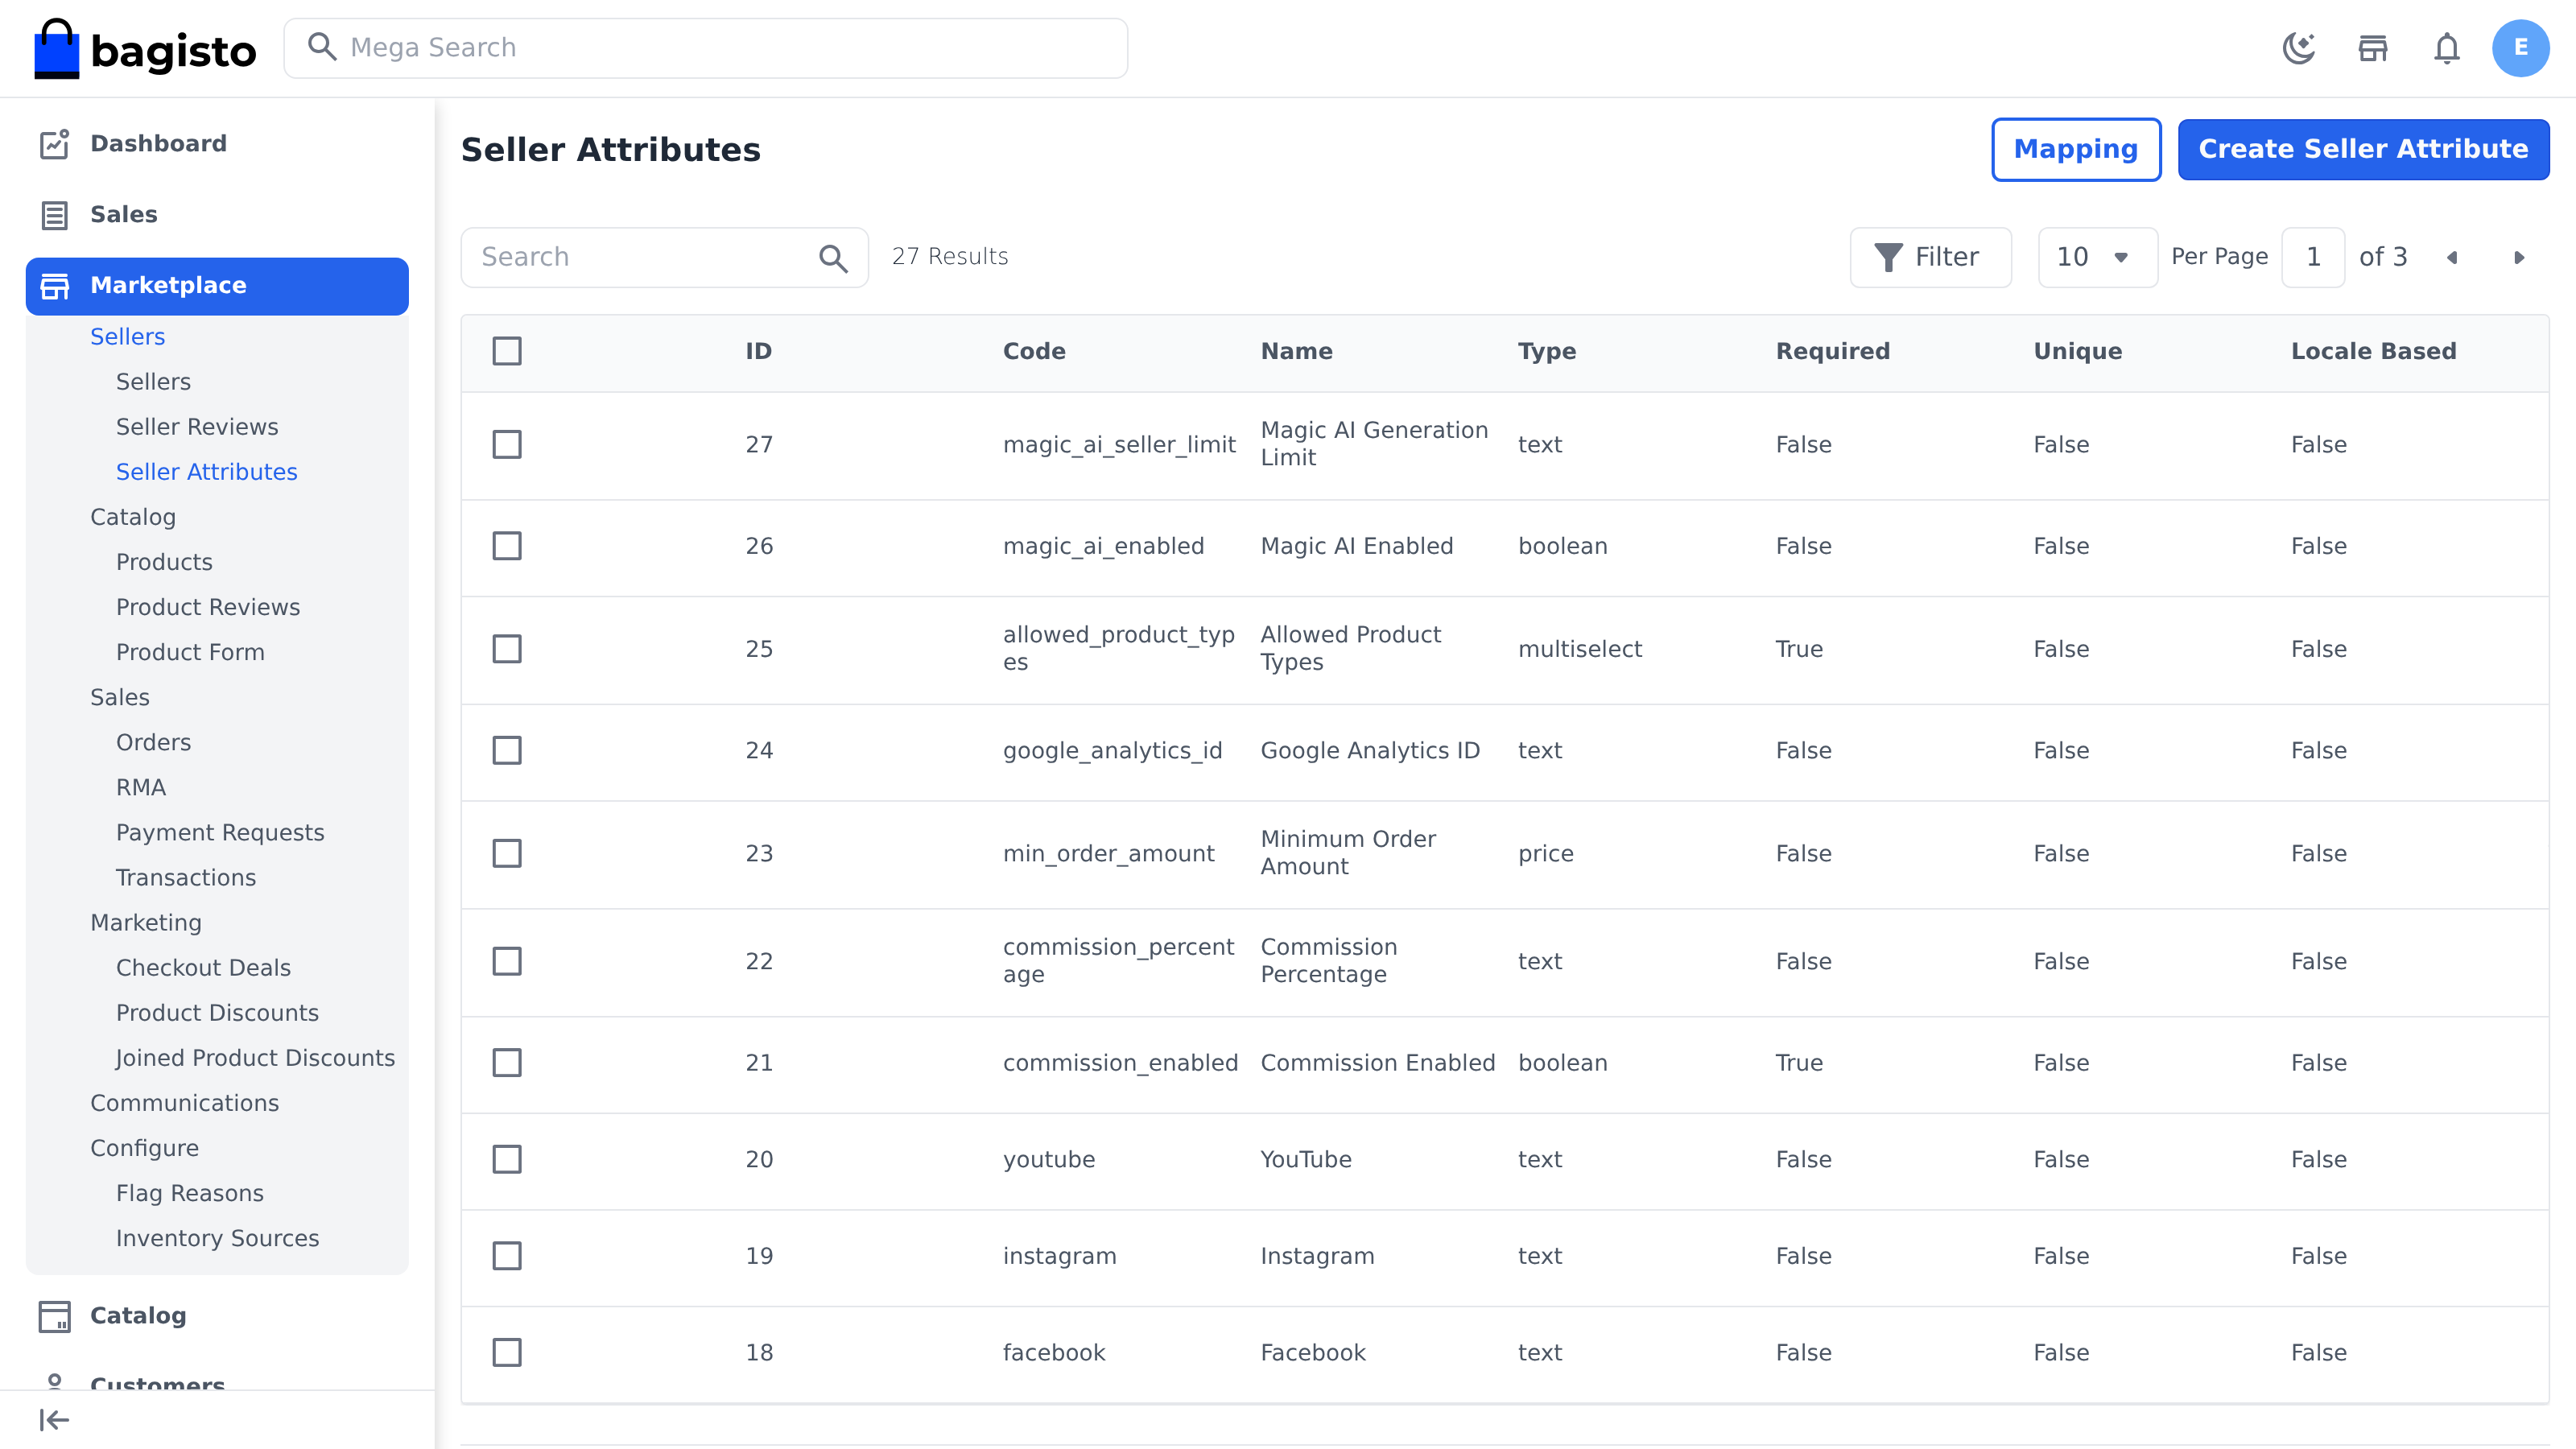
The list shows each attribute's Code, Name and Type, and whether it is required, unique, or saved per language or channel. Use the row icons to edit or delete an attribute. The built-in attributes can't be deleted.
Create an attribute
- Go to Marketplace >> Sellers >> Seller Attributes.
- Click Create Seller Attribute.
- In Label, enter the Admin name, and the name sellers and customers see in each language.
- In General, enter an Attribute Code and choose the Attribute Type.
- Set the options in Validations and Configuration.
- Click Save Seller Attribute.
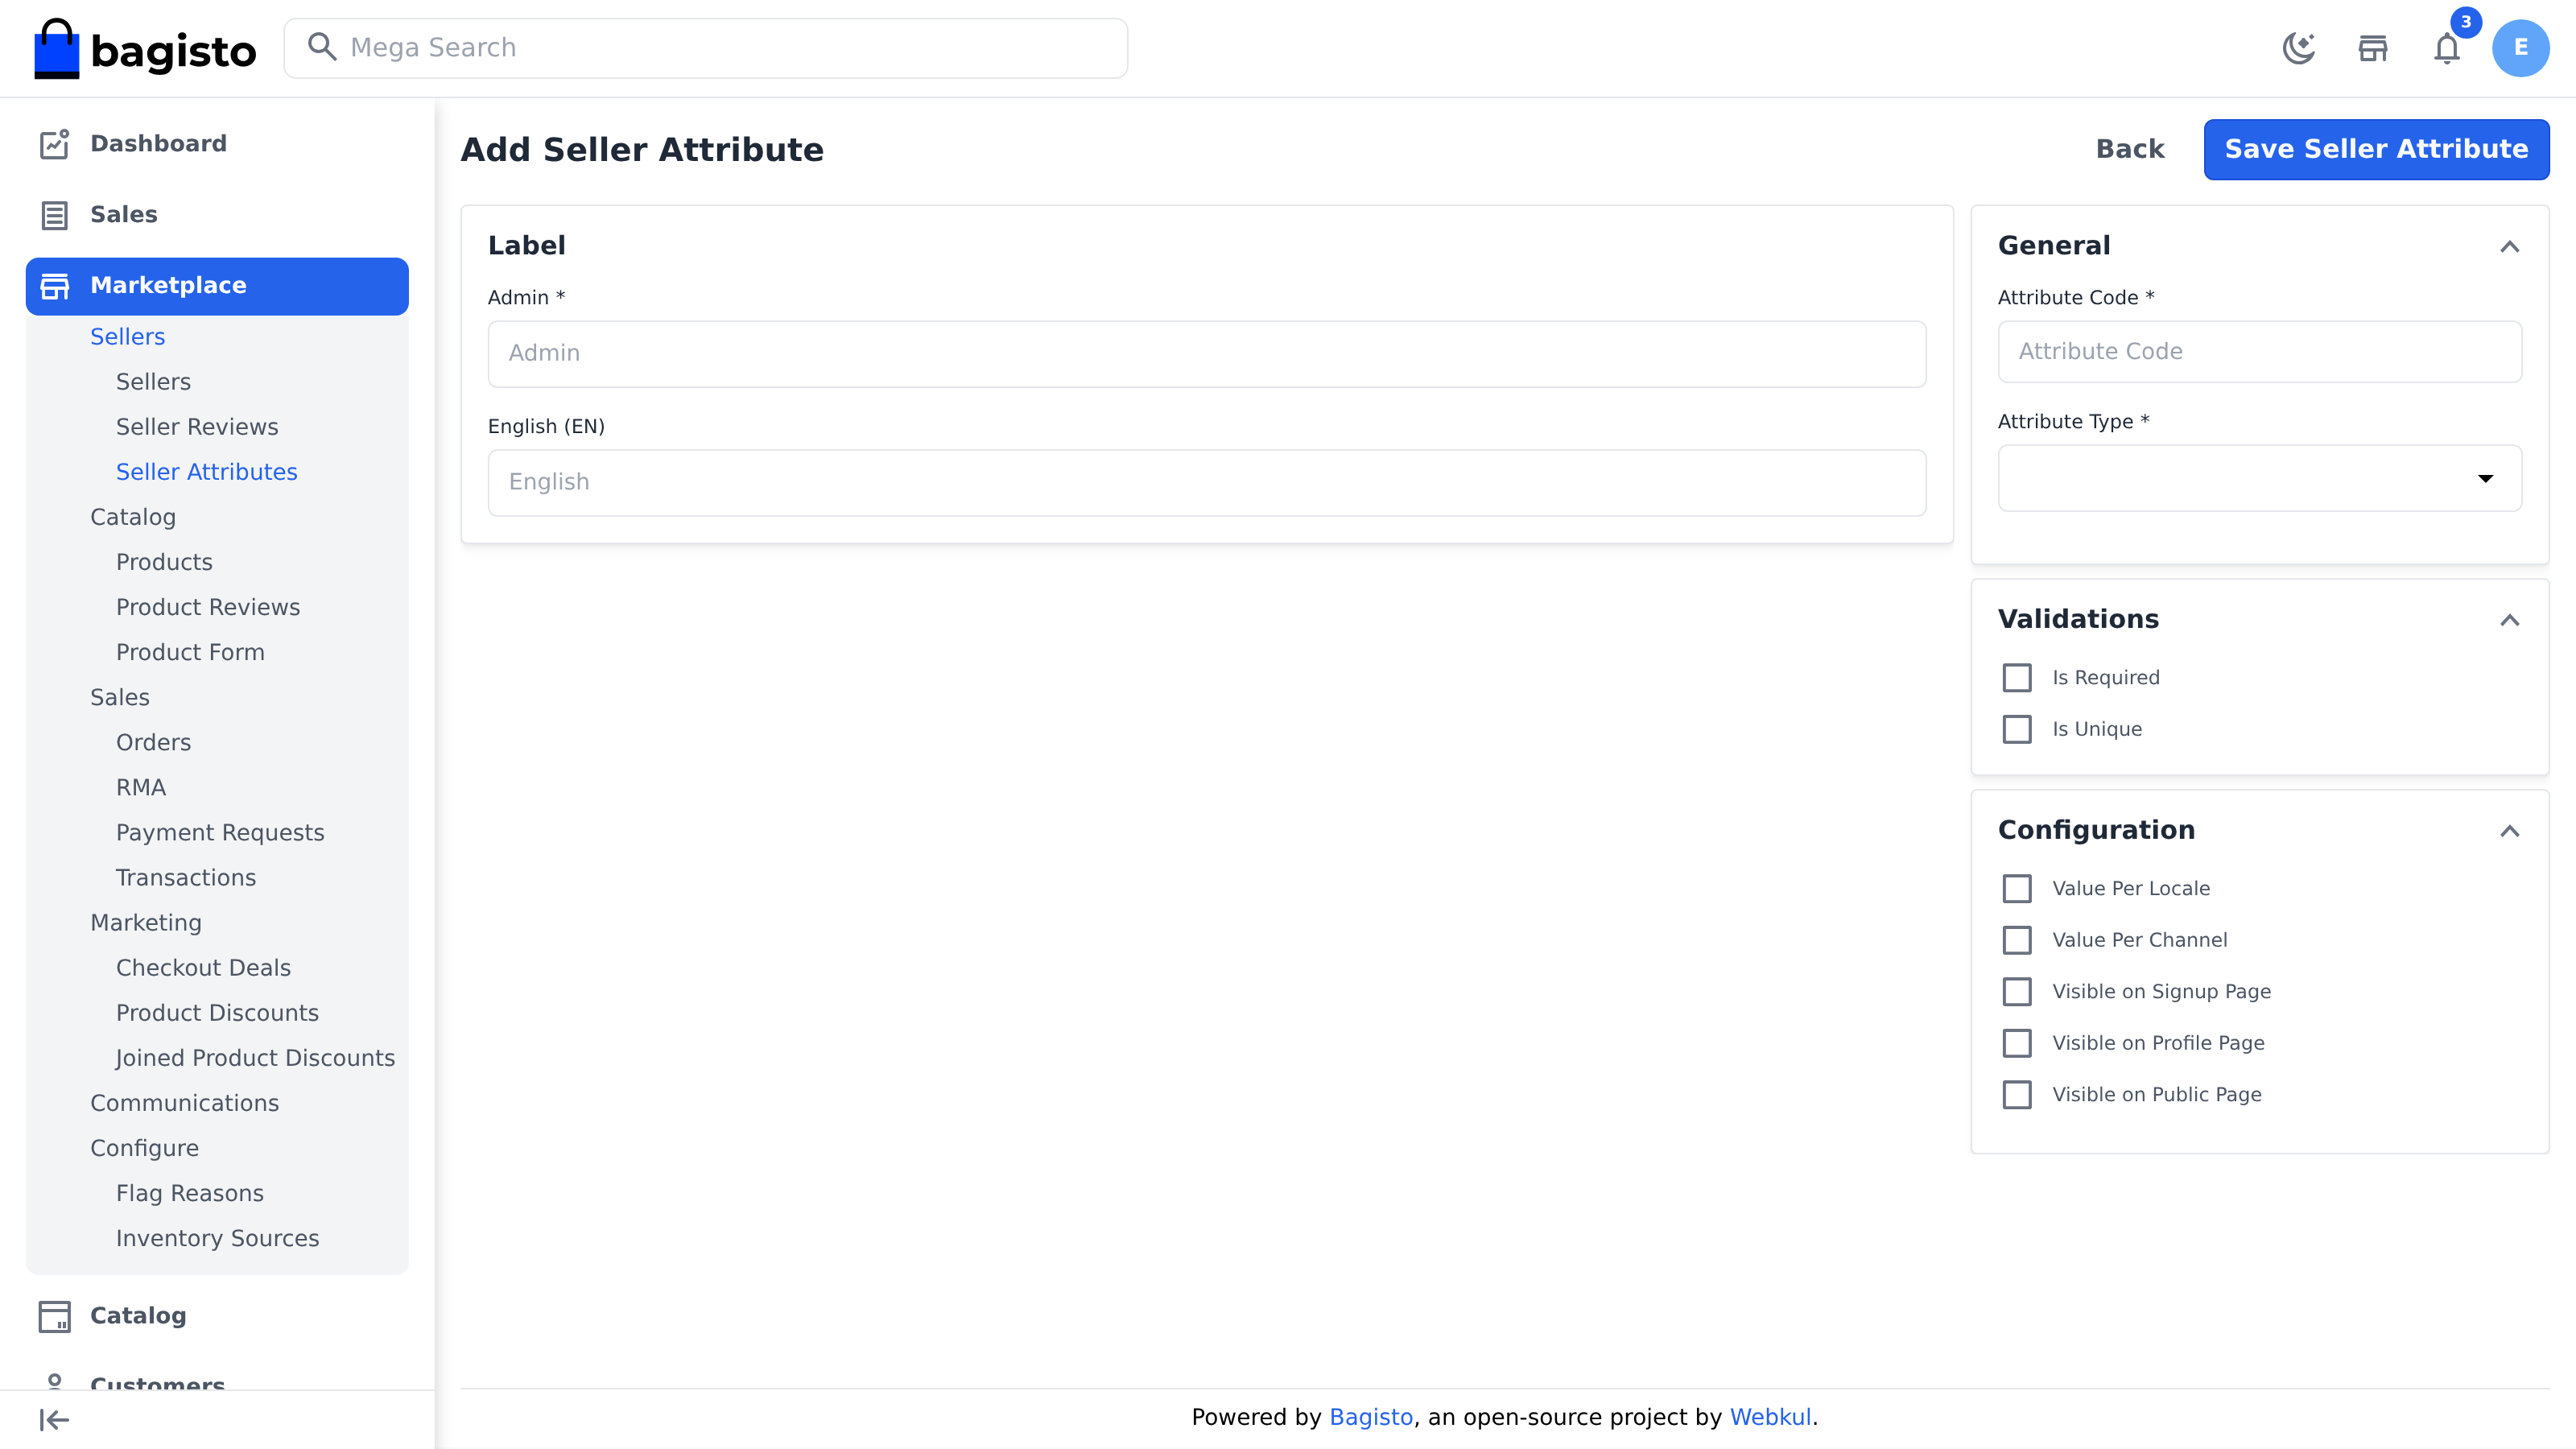
A new attribute doesn't appear anywhere until you place it in a group on the Mapping screen. See Place attributes on the form.
Attribute types
The Attribute Type can be Text, Textarea, Price, Boolean, Checkbox, Select, Multiselect, Date, Datetime, Image or File. Some fields depend on the type:
- Enable Editor gives a Textarea a rich-text editor.
- Default Value sets the starting value of a Boolean.
- Options appears for Select, Multiselect and Checkbox. Click Add Row to add a choice with its name in each language, and drag rows to change their order. For a Select, Create default empty option adds a blank first choice.
- Input Validation appears for Text: Numeric, Email, Decimal, URL or Regex. With Regex, enter the expression in the Regex field.
Validations and configuration
| Setting | What it does |
|---|---|
| Is Required | Sellers must fill in the field. |
| Is Unique | No two sellers can have the same value. |
| Value Per Locale | The seller enters a value for each language. |
| Value Per Channel | The seller enters a value for each channel. |
| Visible on Signup Page | Shows the field on the Become Seller form, under Additional Information. |
| Visible on Profile Page | Shows the field on the seller's Manage Profile page. |
| Visible on Public Page | Shows the value in the About tab of the seller's shop page. |
Once saved, the code, type and Input Validation can't change, and Is Unique, Value Per Locale and Value Per Channel can't be turned off. For built-in attributes, Visible on Profile Page can't change, and Name, Email and Slug always stay required and on the sign-up form.
Place attributes on the form
The Mapping screen arranges attributes into cards, in two columns. The same layout is used on the admin's Edit Seller page and on the seller's Manage Profile page.
- Go to Marketplace >> Sellers >> Seller Attributes.
- Click Mapping.
- Drag an attribute from Unassigned Attributes into a group under Main Column or Right Side Column.
- Click Save Mapping.
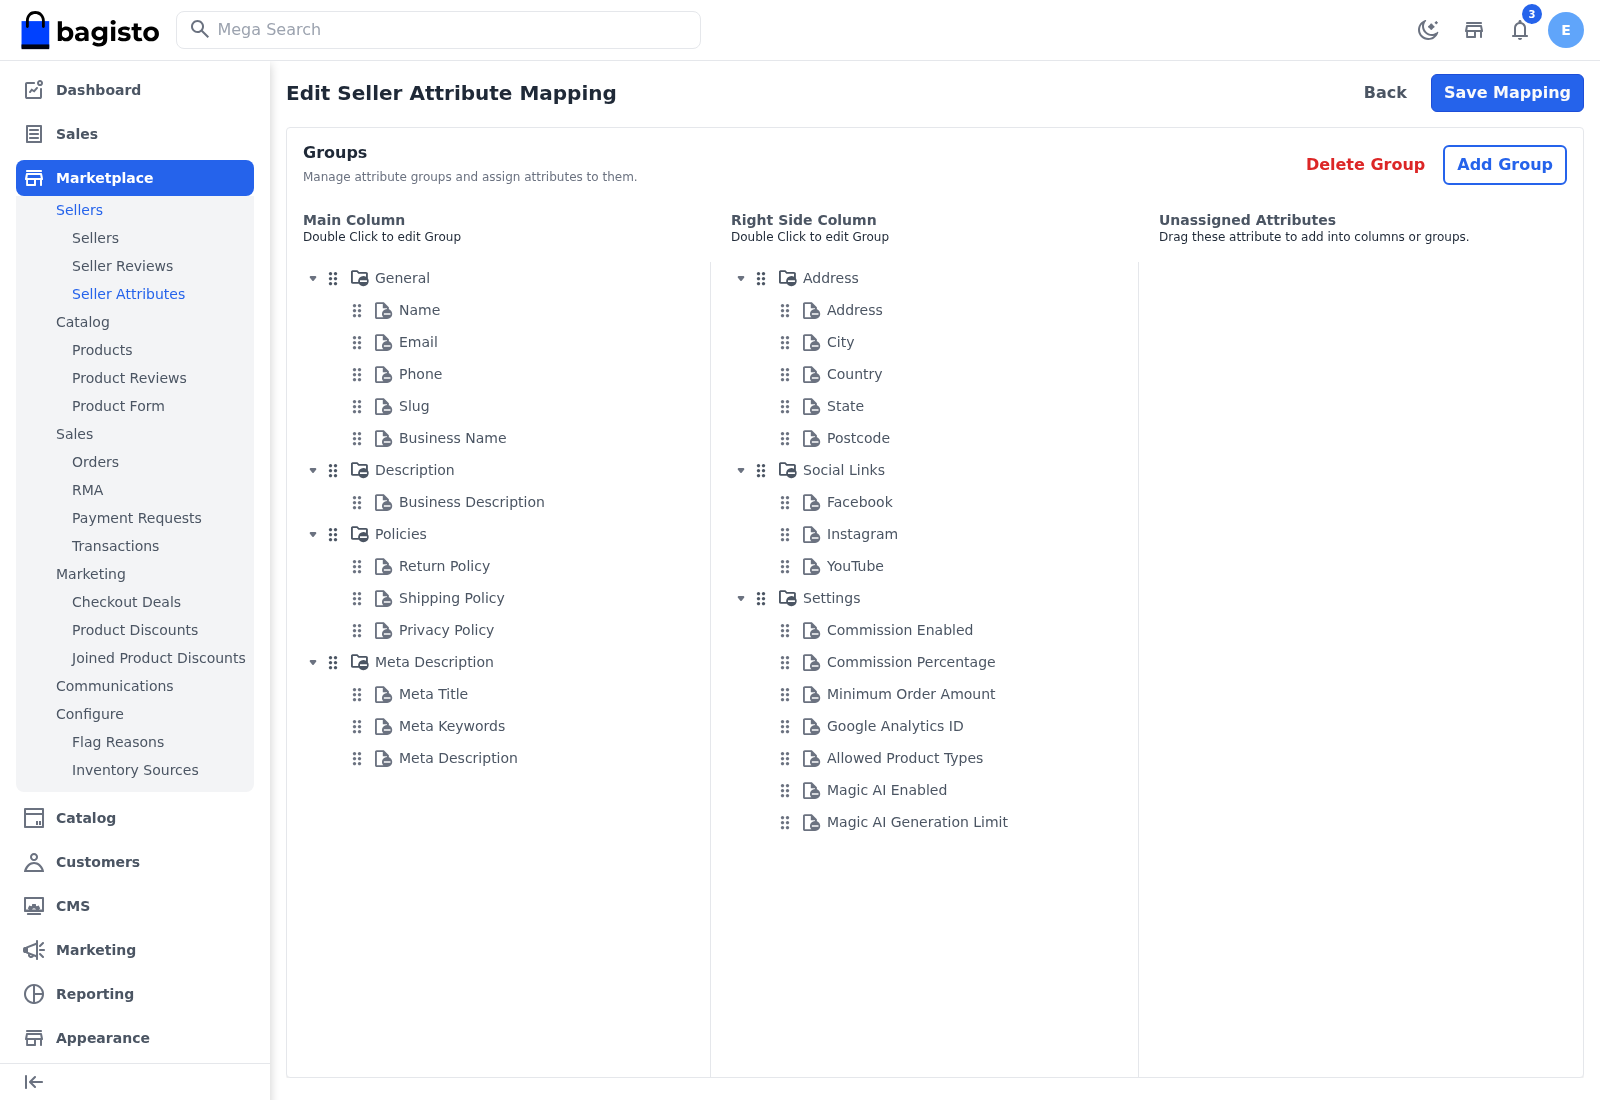
- To add a card, click Add Group, then enter a Code, choose the Column, and enter the Admin Name and the name in each language.
- To rename a group, double-click its name.
- To remove a group, select it and click Delete Group. A group that holds built-in attributes can't be removed until you move them to another group.
The sign-up form doesn't use groups. It shows Name, Email, Slug and the password fields first, then every mapped attribute marked Visible on Signup Page.
Built-in attributes
| Card | Attributes | Seen by |
|---|---|---|
| General | Name, Email, Phone, Slug, Business Name | Name, Email, Slug and Business Name are on the sign-up form; all are on the profile |
| Description | Business Description | Profile; the shop page About tab |
| Policies | Return Policy, Shipping Policy, Privacy Policy | Profile; the shop page About tab when filled |
| Meta Description | Meta Title, Meta Keywords, Meta Description | Profile; used for the shop page in search engines |
| Address | Address, City, Country, State, Postcode | Profile; shown on the shop page |
| Social Links | Facebook, Instagram, YouTube | Profile; the Share menu on the shop page |
| Settings | Minimum Order Amount, Google Analytics ID | Profile |
| Settings | Commission Enabled, Commission Percentage, Allowed Product Types, Magic AI Enabled, Magic AI Generation Limit | Admin only, on Edit Seller |
Permissions
To give another admin access, tick Marketplace >> Sellers >> Seller Attributes in their role, with Create, Edit (which includes Mapping) and Delete as needed.