
Seller Management
As the admin, you approve new sellers, edit their details, set their commission and limits, and suspend or remove them when needed.
The sellers list
Go to Marketplace >> Sellers. The list shows every seller account, but not the team members sellers add to their shops.
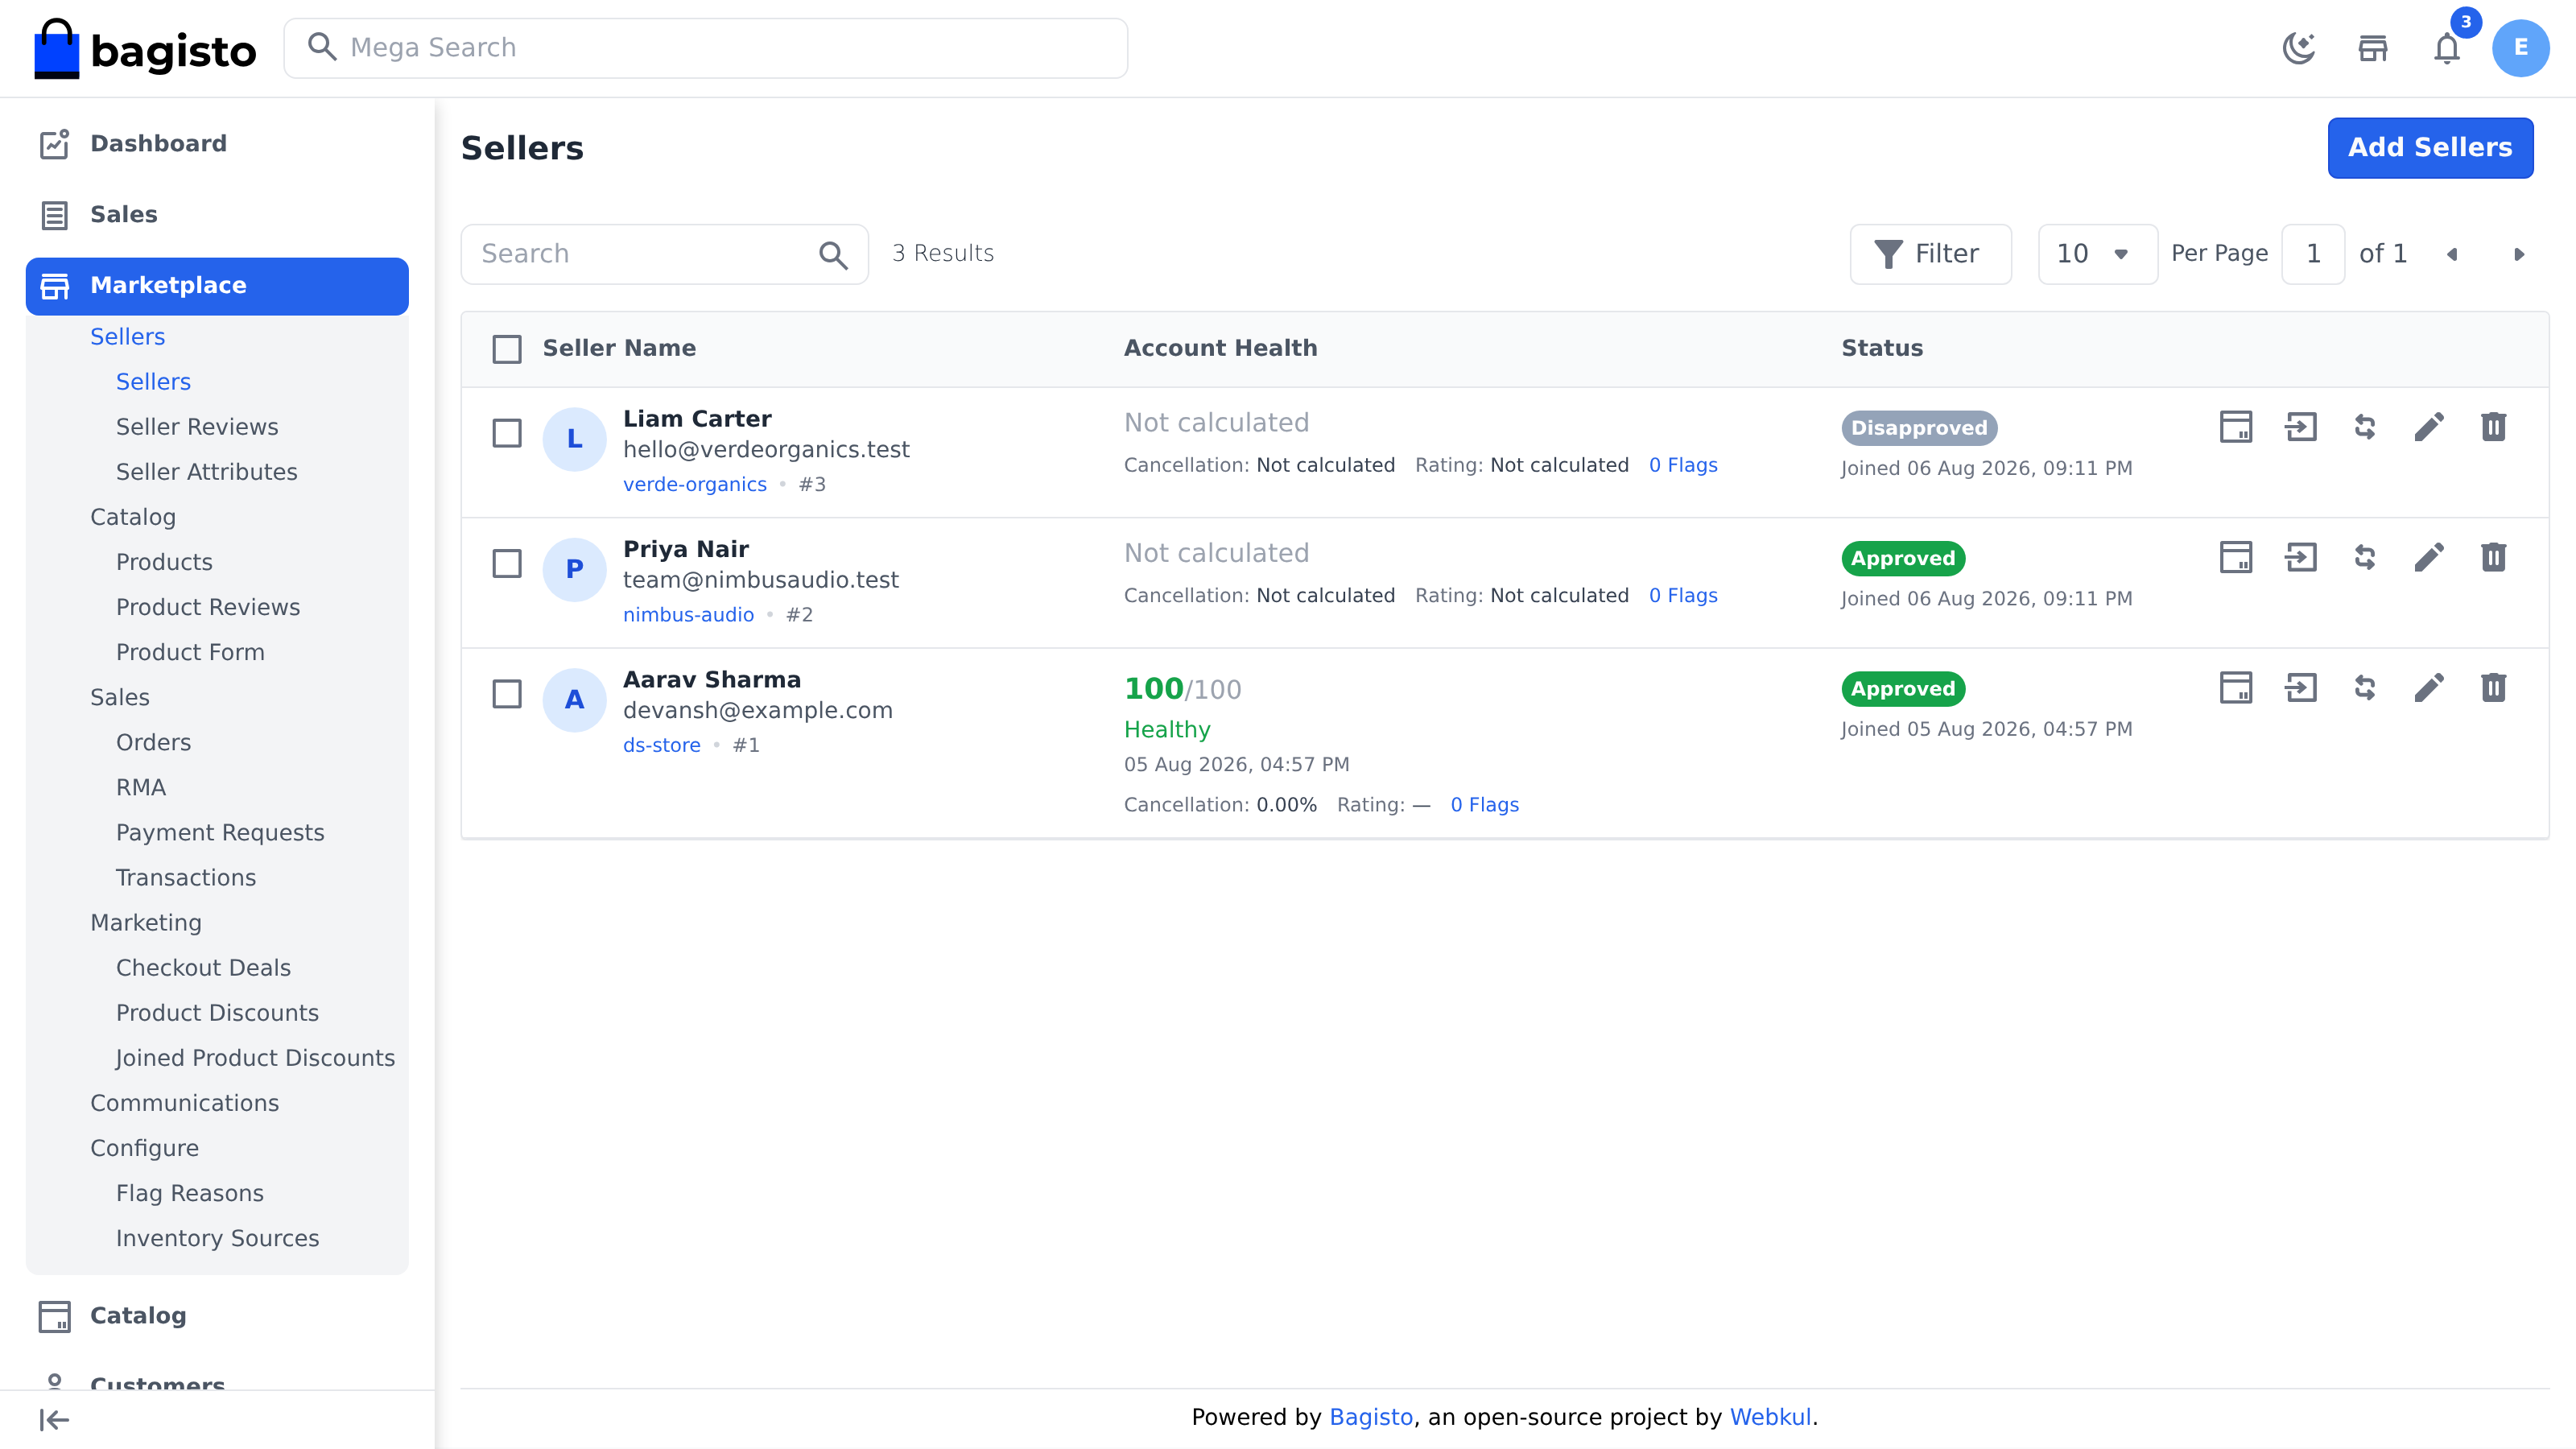
Each row shows:
- Seller Name — the seller's name and email, a link to their shop page and the seller ID.
- Account Health — the health score and its band, the cancellation rate, the average rating, and a link to the seller's flags. See Account Health.
- Status — Approved or Disapproved, Suspended when the account is suspended, and the date the seller joined.
The icons at the end of a row are Assign Product, Login as Seller, Refresh Account Health, Edit and Delete.
Search by name or email, or use Filter to narrow the list by account health, status, suspension or joining date.
Approve or disapprove sellers
- Go to Marketplace >> Sellers.
- Tick the sellers you want to change.
- Click Select Action, point to Update Status and click Approved or Disapproved.
- Click Agree to confirm.
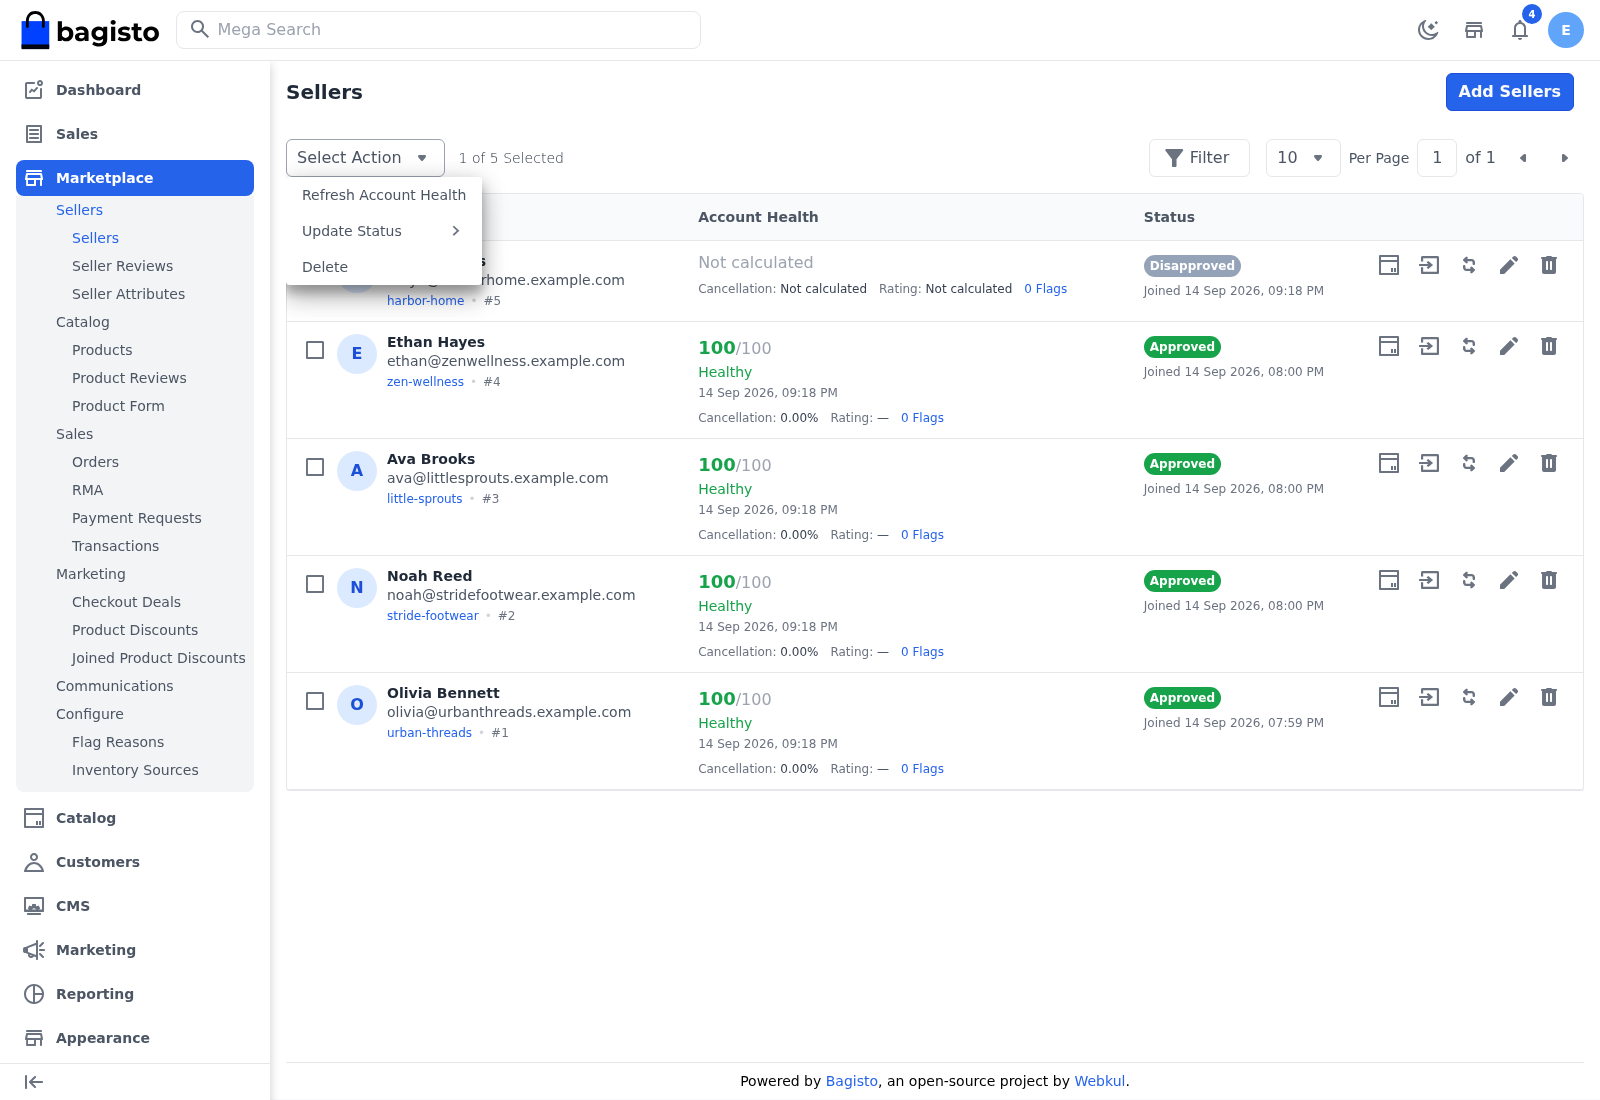
Each seller whose status changes receives a Seller Approval Notification email saying their request was accepted or rejected, and a Seller Profile Update Notification email.
A disapproved seller can't sign in, and their shop page is no longer available.
Whether new sellers need approval at all is set by Approval Required in Sellers settings.
Add a seller
- Go to Marketplace >> Sellers.
- Click Add Sellers.
- In Create Seller, enter the Name, Email, Phone and Slug.
- Enter a Password and Confirm Password.
- Click Save. The seller's Edit Seller page opens so you can add the rest of their details.
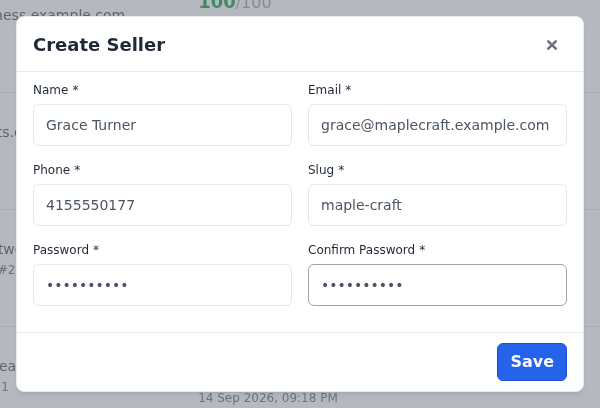
The new seller follows the same approval rule and receives the same emails as a seller who signs up on the storefront.
Edit a seller
- Go to Marketplace >> Sellers.
- Click the edit icon on the seller's row.
- Change the details you need.
- Click Save Seller.
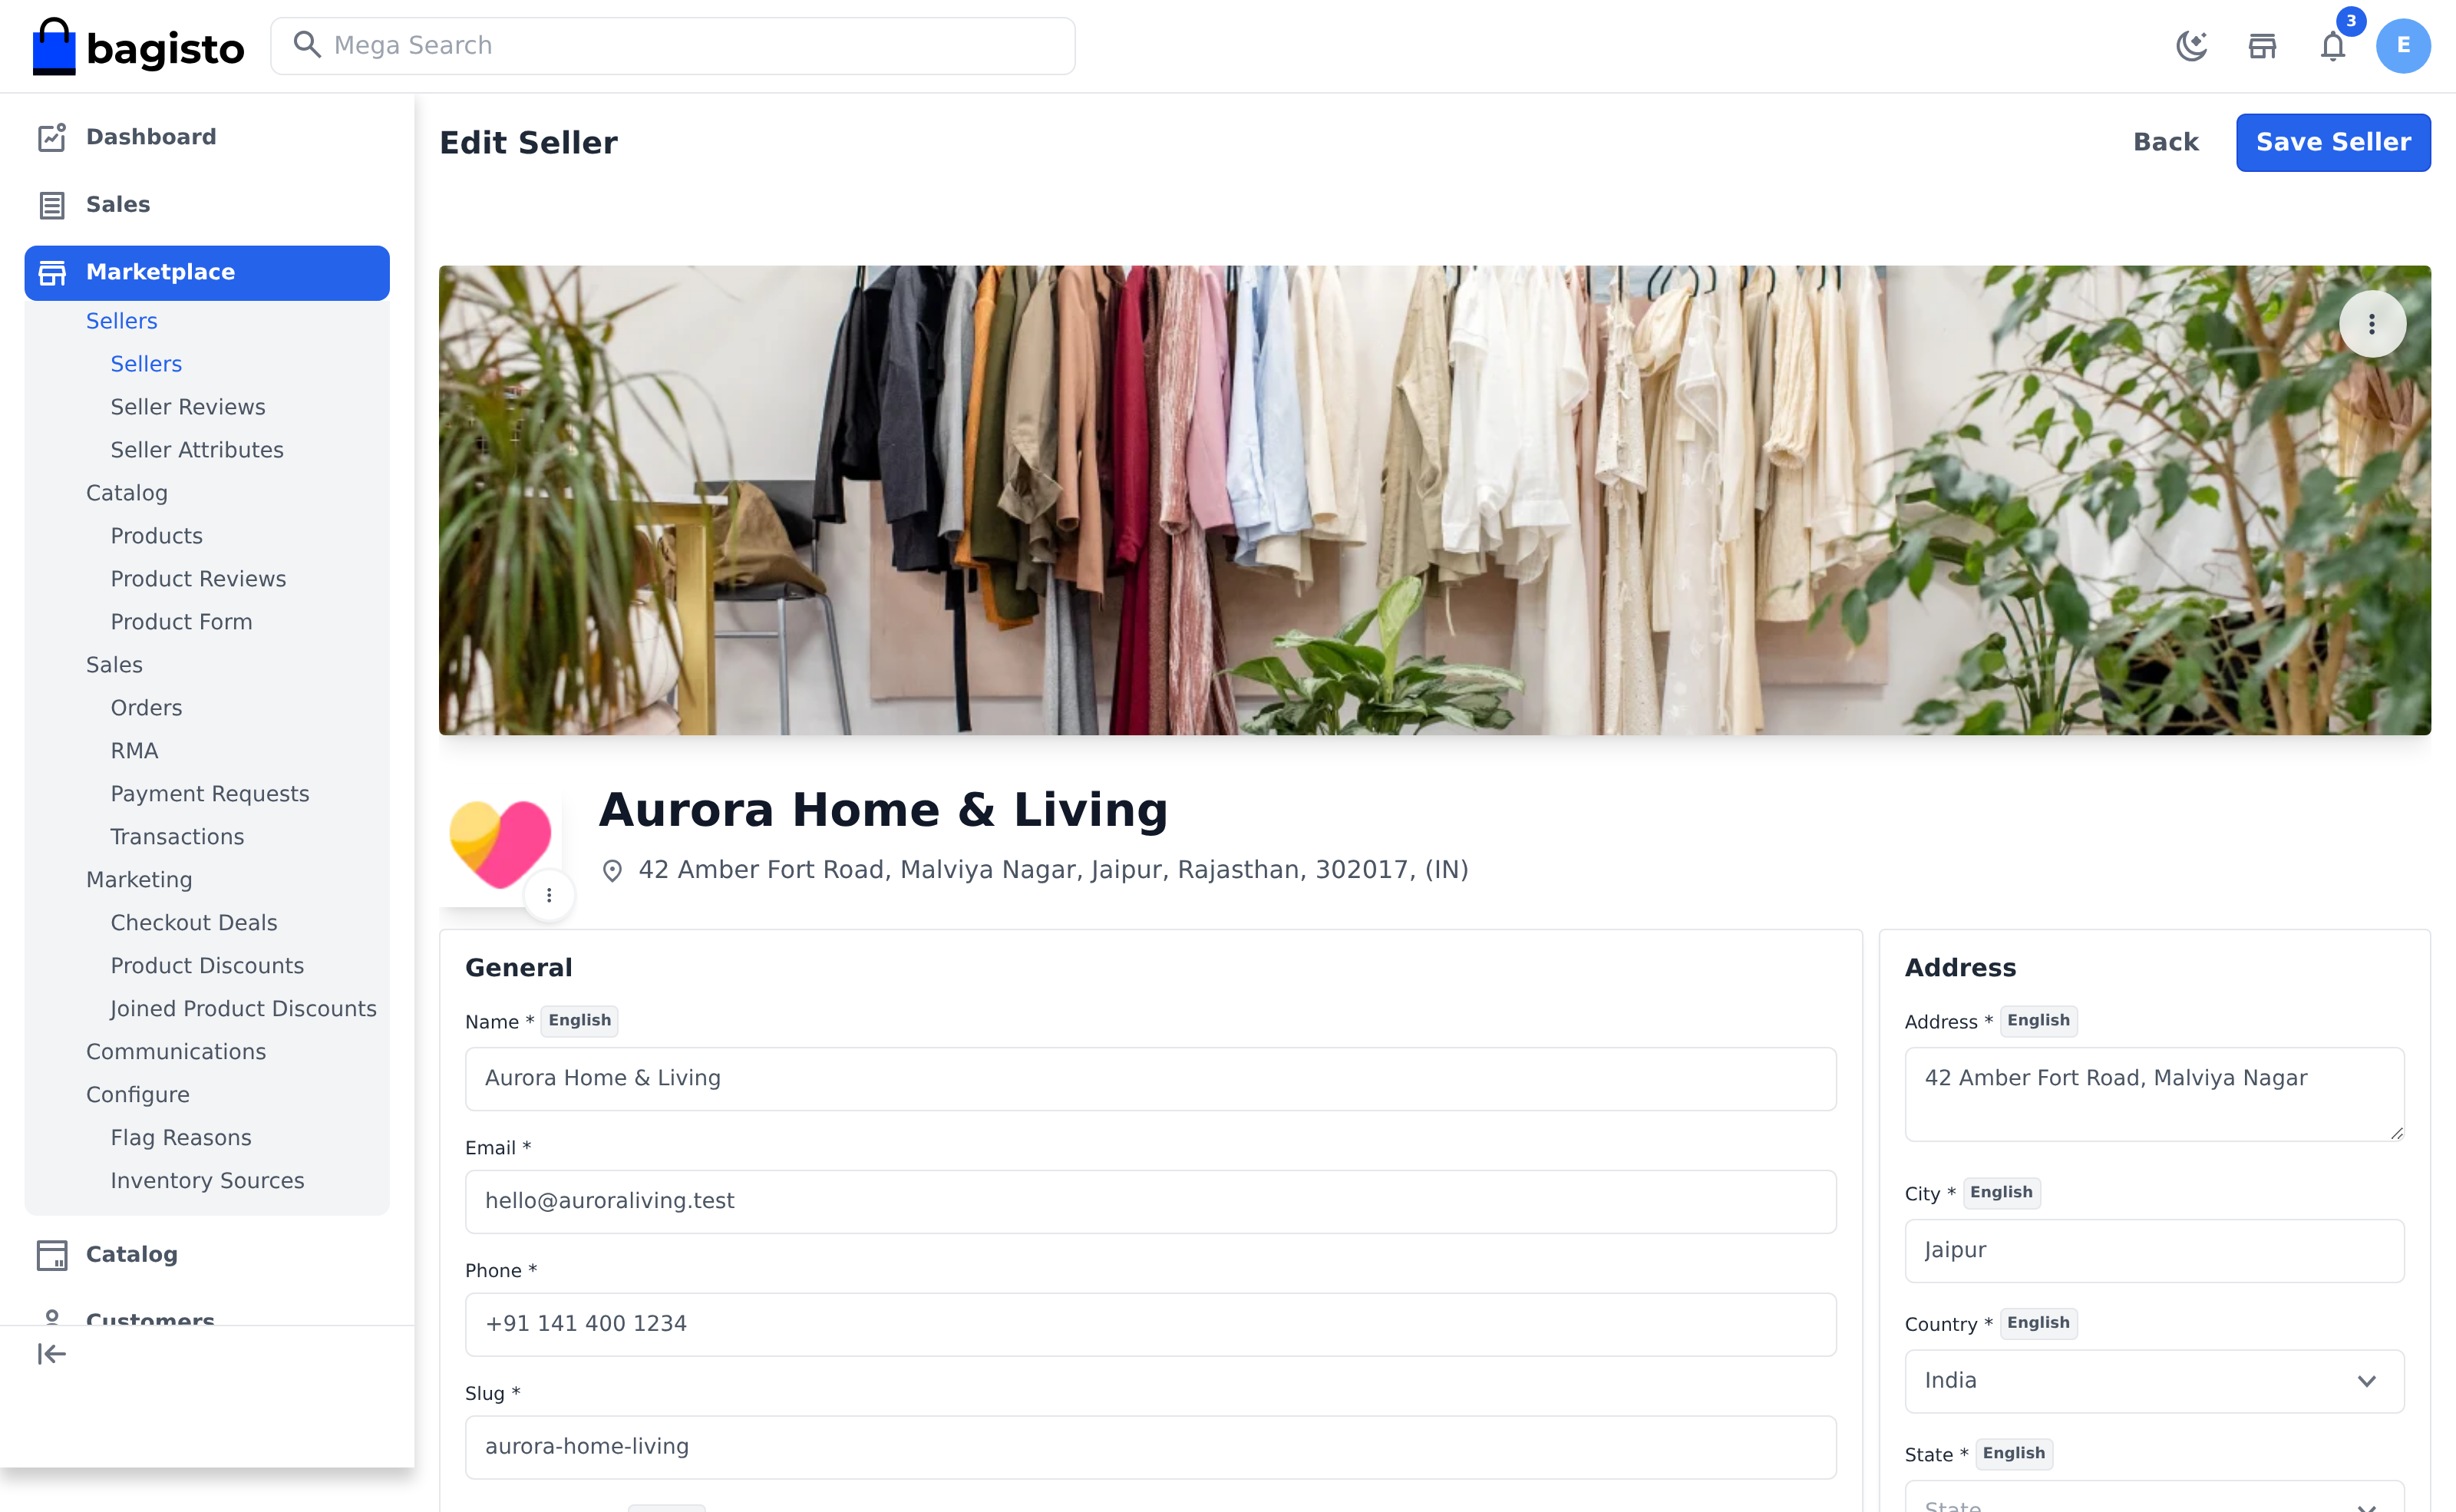
The page has the seller's banner and logo at the top, then the cards you arrange in Seller Attributes: General, Description, Policies, Meta Description, Address, Social Links and Settings. Use the menu on the banner or logo to upload a new image or delete it. A banner in a 3:1 ratio, around 1320×300 pixels, fits best.
The seller receives a Seller Profile Update Notification email each time you save.
Settings for this seller
The Settings card holds the details only you can change:
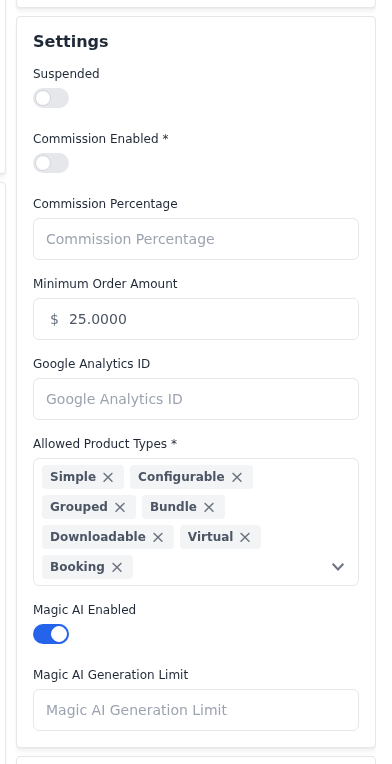
| Setting | What it does |
|---|---|
| Suspended | Suspends the seller. See Suspend a seller. |
| Commission Enabled | Gives this seller their own commission rate instead of the store's rate. |
| Commission Percentage | The seller's own rate, from 0 to 100. Required when Commission Enabled is on. |
| Minimum Order Amount | The least a customer must spend with this seller in one order. It appears when Enable Minimum Order Amount is on in Sellers settings. |
| Google Analytics ID | Adds the seller's Google Analytics tracking to their shop page. |
| Allowed Product Types | The product types this seller can create and sell. |
| Magic AI Enabled | Lets this seller use Generative AI. See Usage Limits. |
| Magic AI Generation Limit | This seller's own Generative AI limit. Leave it empty to use the store's limit, or enter 0 to block it. |
The other cards
- Channel — the channels the seller sells on. It appears when your store has more than one channel.
- Users — the team members the seller has added. It appears once there are any.
- Restricted Categories — categories this seller can't use for their products.
- Seller Sales, Discount, Commission and Seller Earnings — read-only totals for the seller, including how much has been invoiced and paid.
Suspend a seller
- Open the seller's Edit Seller page.
- In Settings, switch Suspended on.
- Click Save Seller.
A suspended seller is signed out of the Seller Panel with the message Your account has been suspended. Contact to admin for any query. Their shop page is no longer available and they are left out of the featured sellers. Switch Suspended off to restore the account.
Sign in as a seller
Click the Login as Seller icon on the seller's row. The Seller Panel opens in a new tab, signed in as that seller, so you can see exactly what they see or help them set up.
Assign a product to a seller
You can list a catalog product for a seller, at the seller's own price and stock:
- Click the Assign Product icon on the seller's row.
- Search for the product and choose it.
- On Assign Product, choose the Condition, and enter the Price, Quantities and Description.
- Click Save.
The seller's profile must be complete first. See Selling Existing Products for how the offer works.
Delete a seller
Click the delete icon on the seller's row, or tick several sellers and use Select Action >> Delete.
A seller who still has pending or processing orders can't be deleted. You'll see Seller has some pending orders. When a seller is deleted, their files and stock records are removed and they receive a Seller Good Bye Notification email.
Seller statuses
| Status | How it is set | What the seller can do |
|---|---|---|
| Approved | You approve the seller, or approval isn't required | Sign in and sell. Their shop page is public when Show Publicly is on. |
| Disapproved | New sellers when approval is required, or you disapprove them | Can't sign in. Their shop page isn't available. |
| Suspended | You switch Suspended on | Signed out and can't use the Seller Panel. Their shop page isn't available. |
Seller emails
| Sent to | When | |
|---|---|---|
| New Seller Registration | Store admin | A seller signs up or you add one |
| Seller Welcome Notification | Seller | A seller signs up or you add one |
| Seller Approval Notification | Seller | The seller is approved or disapproved, or is created already approved |
| Seller Profile Update Notification | Seller | The seller's details or status are saved, by you or by the seller |
| Seller Good Bye Notification | Seller | The seller is deleted |
The admin email goes to the address in the store's email settings.
Permissions
To give another admin access, tick Marketplace >> Sellers >> Sellers in their role, along with Create, Edit, Delete, Assign Product and Refresh Account Health as needed.